This week is another mobile focused blog post. This week is al around Microsoft Tunnel. More specifically, this week is all about using Microsoft Tunnel for providing per-app VPN on iOS/iPadOS devices and Android devices. Per-app VPN enables organizations to only allow specifically configured apps to use the configured VPN tunnel. So, not simply pushing all traffice through the VPN tunnel, but only the traffic of specific apps. That provides a solid method for providing access to on-premises resources for only the apps that really need it. This post will start with a quick summary of what should be in place, followed by going through the important per-app VPN specific configurations. Those configurations slightly differ per platform. This post will end by showing the user experience on iOS/iPadOS devices and on Android devices.
Important: Keep in mind that Microsoft Tunnel is only available for iOS/iPadOS devices and Android devices.
Prerequisites for per-app VPN with Microsoft Tunnel
When looking at using Microsoft Tunnel for providing per-app VPN functionality, it’s important to keep in mind that this post won’t go into the details about installing and configuring Microsoft Tunnel itself. This post will focus on the per-app VPN specific configurations. That means that the following should be in place:
- Microsoft Tunnel Gateway should be installed and configured as shown in the beginning of this post
- Microsoft Defender for Endpoint app is distributed to iOS/iPad devices and Android devices
- (If needed) Microsoft Defender for Endpoint app is configured for use with Microsoft Tunnel only as shown in this post
Using Microsoft Tunnel for providing per-app VPN on Android devices
When a Microsoft Tunnel Gateway is availabe and the Microsoft Defender for Endpoint app is distributed, the only configuration left for providing per-app VPN functionality on Android devices is a VPN profile.
Creating and distributing VPN profile for Android devices
For Android devices the creation and distribution of a VPN profile is pretty straight forward, but there are some important configurations that need attention when focussing on providing per-app VPN. The following eight steps walk through the process of creating a VPN profile for the different corporate-owned Android Enterprise managed devices that can be used for per-app VPN. Even though the corporate-owned device and personal device deployment scenarios require a separate VPN profile, the steps below are similar for both deployment scenarios.
- Open the Microsoft Endpoint Manager admin center portal navigate to Devices > Android > Configuration profiles
- On the Android | Configuration profiles blade, select Create profile
- On the Create a profile page, provide the following information and click Create
- Platform: Android Enteprise
- Profile: Select Fully Managed, Dedicated, and Corporate-Owned Work Profile > VPN or select Work Profile > VPN, depending on the Android Enterprise deployment scenario
- On the Basics page, provide the following information and click Next
- Name: Provide a valid name for the VPN profile
- Description: (Optional) Provide a valid description for the VPN profile
- On the Configuration settings page, provide the following information and click Next
- Connection type: Select Microsoft Tunnel
- Base VPN > Connection name: Provide a valid name for the VPN profile that will be shown to the user
- Base VPN > Microsoft Tunnel site: Select the Site that will be used by this VPN profile
- Per-app VPN > Select apps that would be allowed to use this VPN connection: Click Add to select the different store apps that should be allowed to use the VPN connection
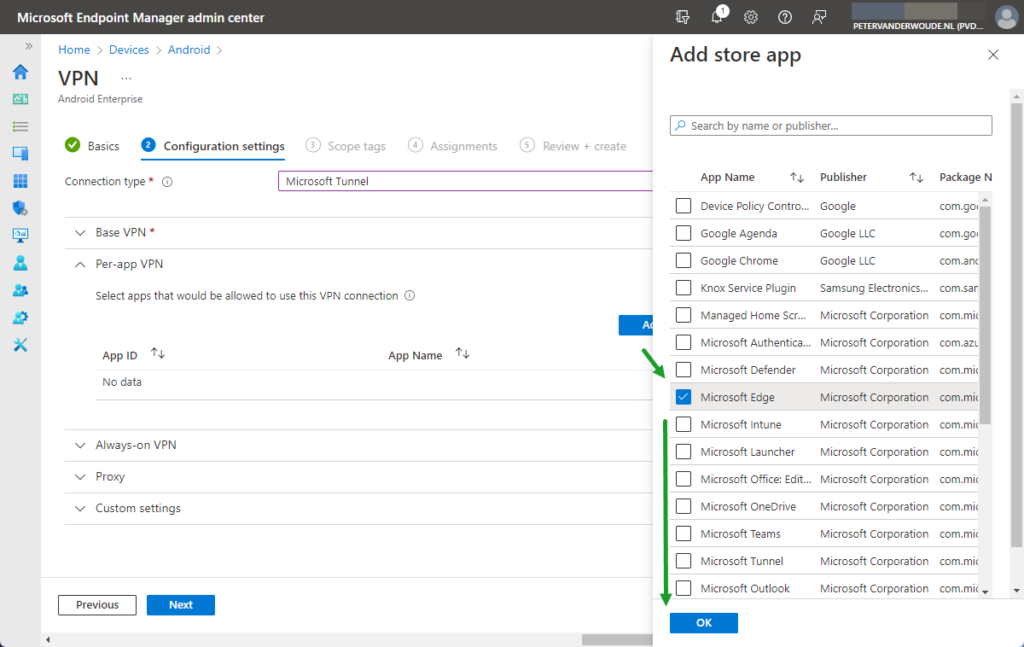
Note: Keep in mind that apps should be added to Microsoft Intune first before those apps are selectable for adding in the VPN profile. And once an app is added to the list, the VPN connection will be limited to the selected apps.
- Always-on VPN > Always-on VPN: Select Enable to make sure that the VPN will automatically connect
- Proxy > Automatic configuration script: (Optional) Configure the location of the automatic configuration script
- Proxy > Address: (Optional) Configure the address of the proxy server
- Proxy > Port number: (Optional) Configure the port number of the proxy server
- Custom settings > (Optional) Add the Configuration key, Value type and Configuration value of the configuration options
- On the Scope tags page, click Next
- On the Assignments page, configure the assignment to the required users and/or devices and click Next
- On the Review + create page, verify the configuration and click Create
Using Microsoft Tunnel for providing per-app VPN on iOS devices
When a Microsoft Tunnel Gateway is availabe and the Microsoft Defender for Endpoint app is distributed, the configurations left for providing per-app VPN functionality on iOS/iPadOS devices are creating a VPN profile and linking that VPN profile to the assingments of the apps that should be using the VPN connection.
Creating and distirbuting VPN profile for iOS/iPadOS devices
For iOS/iPadOS devices the creation and distribution of a VPN profile is also pretty straight forward, but there are some important configurations that need attention when focussing on providing per-app VPN. The following eight steps walk through the process of creating a VPN profile for iOS/iPadOS devices. These steps are nearly identical to the steps for creating a VPN profile for Android Enterprise devices. Only the available configurations for per-app VPN, in step 5, are slightly different.
- Open the Microsoft Endpoint Manager admin center portal navigate to Devices > iOS/iPadOS > Configuration profiles
- On the iOS/iPadOS | Configuration profiles blade, select Create profile
- On the Create a profile page, provide the following information and click Create
- Platform: iOS/iPadOS
- Profile: Select VPN
- On the Basics page, provide the following information and click Next
- Name: Provide a valid name for the VPN profile
- Description: (Optional) Provide a valid description for the VPN profile
- On the Configuration settings page, provide the following information and click Next
- Connection type: Select Microsoft Tunnel
- Base VPN > Connection name: Provide a valid name for the VPN profile that will be shown to the user
- Base VPN > Microsoft Tunnel site: Select the Site that will be used by this VPN profile
- Base VPN > Disconnect on sleep: (Optional) Select Enable to disconnect the VPN connection on sleep
- Per-app VPN > Per-app VPN: Select Enable to use this VPN profile for specific apps
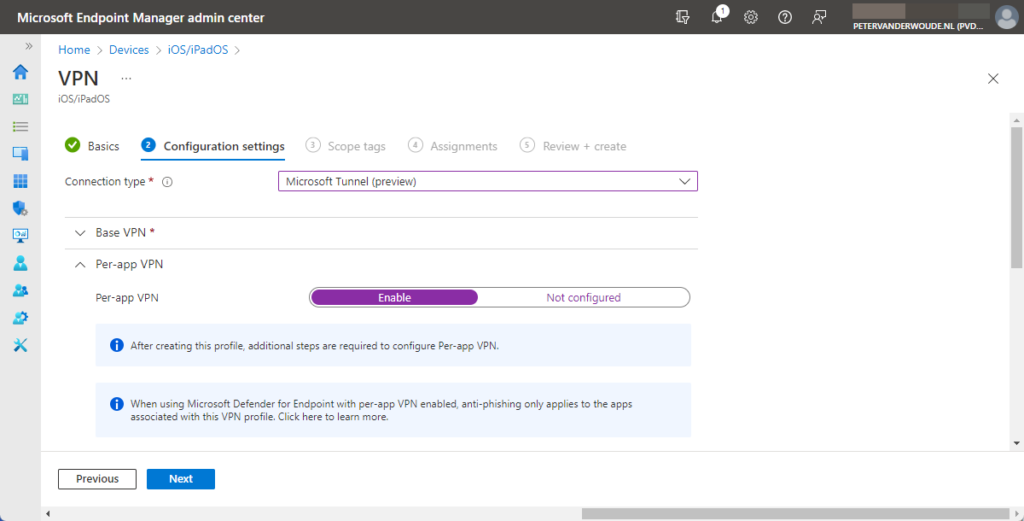
Note: Keep in mind that this only enables the VPN profile for usage with per-app VPN. After that it must still be linked in the assignment of the apps that should be using the VPN connection.
- On-Demand VPN Rules > On-demand rules: (Optional) Add rules to configure the behavior for any network connection
- On-Demand VPN Rules > Block users from disabling automatic VPN: (Optional) Select Yes to prevent users from disablig
- Proxy > Automatic configuration script: (Optional) Configure the location of the automatic configuration script
- Proxy > Address: (Optional) Configure the address of the proxy server
- Proxy > Port number: (Optional) Configure the port number of the proxy server
- Custom settings > Add the Key and Value of the required configuration options
- On the Scope tags page, click Next
- On the Assignments page, configure the assignment to the required users and/or devices and click Next
- On the Review + create page, verify the configuration and click Create
Important: When using Microsoft Defender for Endpoint with per-app VPN enabled, web protection only applies to the apps that are associated with this VPN profile.
Linking VPN profile in app assignment settings
After creating and disitrubuting the per-app VPN profile, the profile must still be linked to the apps that are allowed to use the VPN connection. That can be achieved by editting or creating an app assignment. The following steps walk through the process of editting an existing assignment of an app and adding the VPN profile.
- Open the Microsoft Endpoint Manager admin center portal navigate to Apps > iOS/iPadOS
- On the iOS/iPadOS | iOS/iPadOS apps page, select the app that should be using the VPN connection and click Edit with Assignments
- On the Edit applications page, select the existing assignment
- On the Edit assignment blade, in the App settings section, select the just created VPN profile with VPN and click OK > Review + save
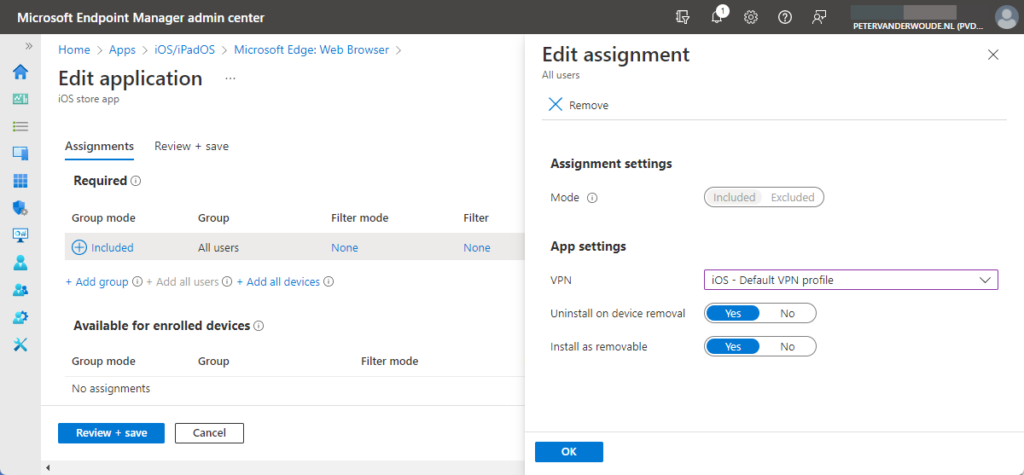
- On the Review + save page, click Save
User experience with per-app VPN via Microsoft Tunnel
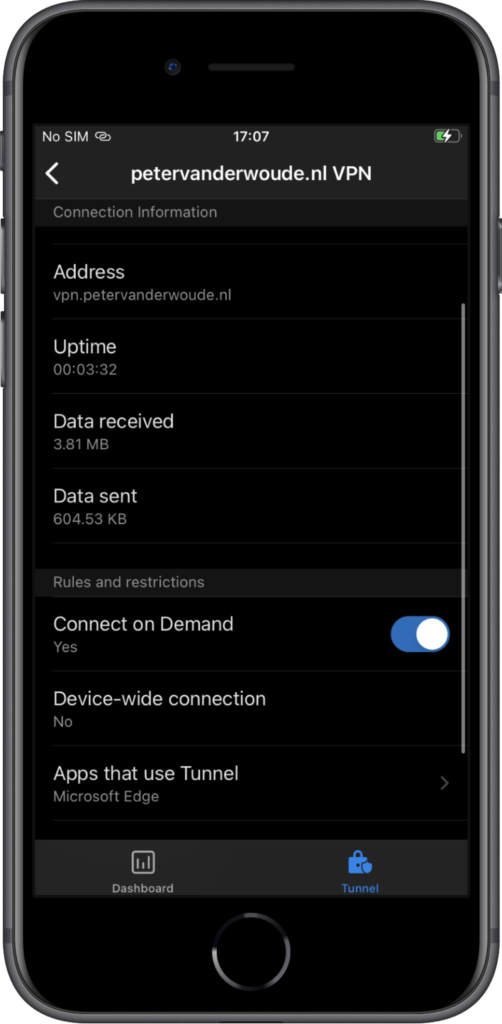
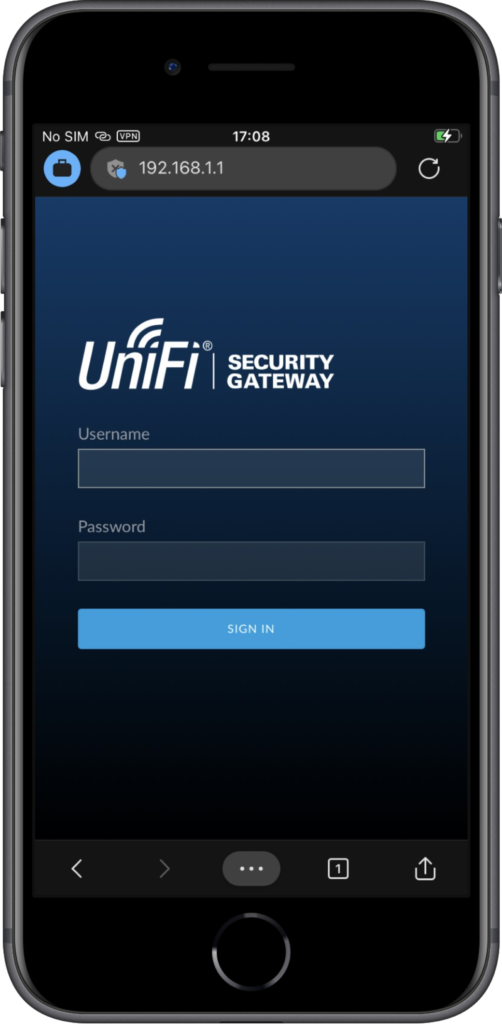
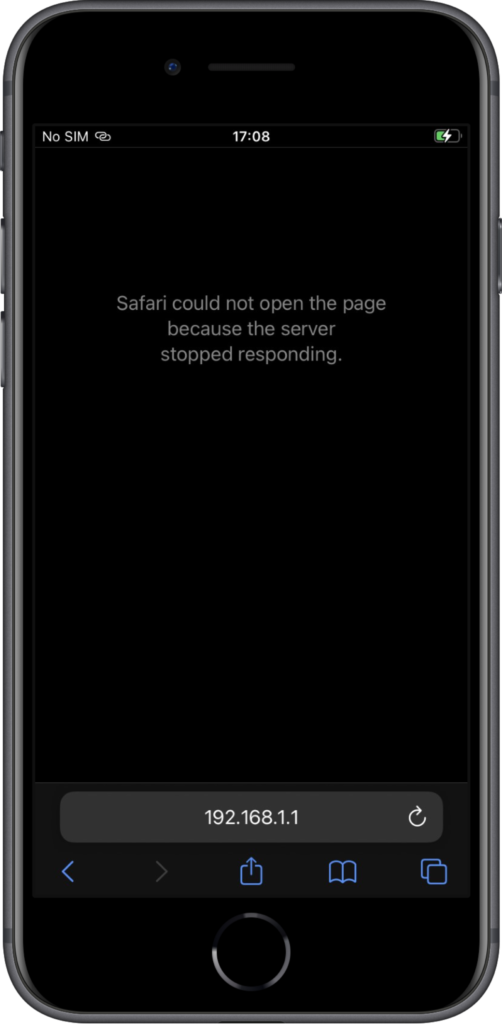
When looking at the user experience with per-app VPN via Microsoft Tunnel, it’s interesting to look at the behavior on iOS and Android devices. And by looking at the the applied configuration and the user experience in different apps. Below, in Figure 4, is the per-app configuration in the Microsoft Defender for Endpoint app on an iOS device that clearly shows that only Microsoft Edge is allowed to use the VPN connection. Below, in Figure 5, Microsoft Edge is used for connecting to an internal resource. The connection is successful and it shows on top that the VPN connection is used. Below, in Figure 6, Safari is used for accessing the same internal resource. As expected the connection is not successful.
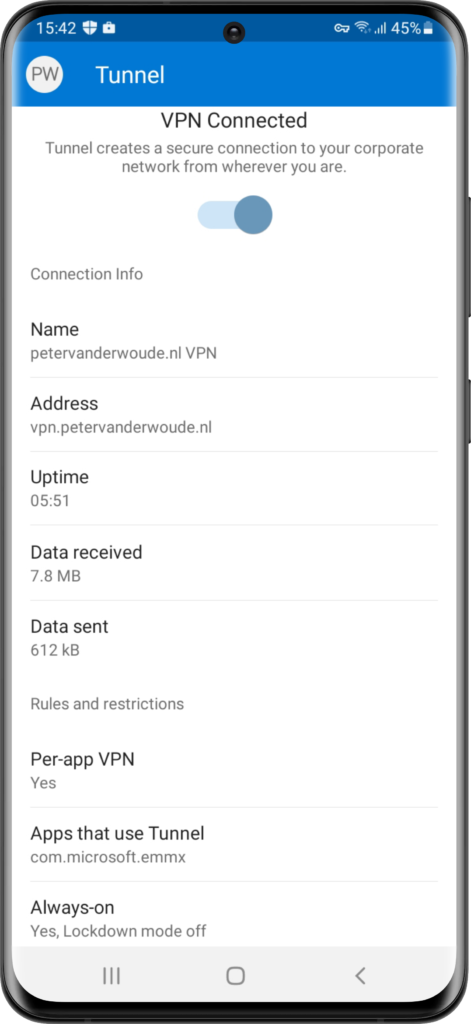
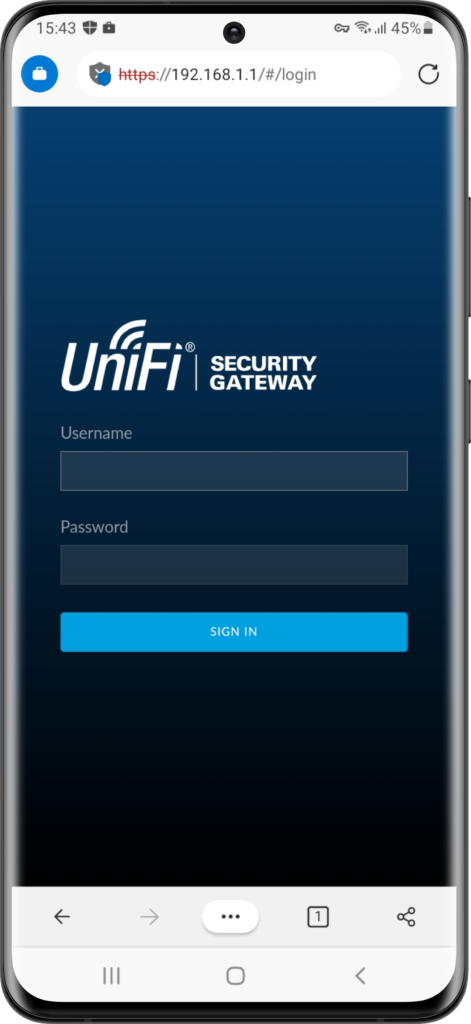
The experience is similar on Android devices. Only a few minor differences. Below, in Figure 7, is the per-app configuration in the Microsoft Defender for Endpoint app on an Android device that clearly shows that per-app VPN is enabled an that only Microsoft Edge is allowed to use the VPN connection. Below, in Figure 8, Microsoft Edge is used for connecting to an internal resource. The connection is successful and it shows on top that the VPN connection is enabled. It doesn’t, however, only show that information when the VPN connections is used. Below, in Figure 9, Safari is used for accessing the same internal resource. As expected the connection is not successful, but on top it still shows that the VPN connection is enabled.
More information
For more information about Microsoft Tunnel and per-app VPN, refer to the following docs.

Hi Team,
We also recently created a lab to test this Microsoft Tunnel for Intune to access Intranet website. Tunnel is setup and we are able to access the Intranet website from the edge browser. Our requirement is to access these apps via Microsoft Edge browser only and activate the VPN when accessing intranet website so we are using per-app VPN.
Regarding Microsoft Tunnel there are some feedbacks:
1. When we created the demo we encountered this issue – On iOS Edge browser the site is not reachable if we enter the website URL(http://www.test.local) however it is working when we enter IP address of the intranet website (192.168.0.6). This is the same behavior tested on 2 different iOS devices. But if we are trying on Android Edge browser the site is working fine and reachable via URL and IP address both no issue here in Android Edge browser.
We have posted this question on Microsoft Q&A but no response. Here’s the link to that Question [https://docs.microsoft.com/en-us/answers/questions/873420/microsoft-tunnel-internal-url-is-not-working-in-io.html]
2. Split tunneling is also not achievable based on URL. As per Microsoft Tunnel Split Tunneling configuration it just allows to split tunnel based on IP ranges not URL based filtering.
3. No way to filter the mobile traffic in per-app VPN method for Internal application meaning we cannot exclude URL’s from going through Microsoft tunnel. In case of per-app VON all the traffic from edge browser will go through the Tunnel, no exclusion for specific URL to be bypassed from going through Tunnel
Hi Rahul,
Thank you for sharing your experiences. Regarding the first item, I recall seeing that behavior during some testing recently. You might want to address that with Intune Support instead of Microsoft Q&A.
Regards, Peter
This might be part of your challenge here Rahul: “The Internet Engineering Task Force (IETF) reserves the use of the domain name label .local as a special-use domain name for hostnames in local area networks that can be resolved via the Multicast DNS name resolution protocol”. https://en.wikipedia.org/wiki/.local
Hi Peter,
Have you had any experience of configuring MS Tunnel with a pac file that routes Internet traffic via a Web Gateway? Just that we have this configured but am unable to enable full Internet browsing using Edge (per App VPN) as every external site being accessed is returning ‘Your connection is not Private’ which isn’t good from a Security perspective. Even though the full chain of the Web Gateway certificate is deployed to mobiles. It appears to me that the issue is that Edge is not trusting MS Tunnel, though the mobiles have been deployed the same root cert.
Would be interested in your thoughts as I’m not getting anywhere with Microsoft.
Thanks
Mark
Hi Mark,
Are you sure that behavior is comming from Tunnel and not from the Web Gateway?
Regards, Peter
Are you able to browse to external websites with this setup? I was told if you have configured Split tunnel rules and enable per-App VPN, the split tunnel rules are ignored. Does that mean we have to trigger the Tunnel manually when split tunnel is enabled?
Hi John,
That depends on the platform. For Android devices it is supported to route traffic through a per-app VPN and using split tunneling rules independently, or at the same time. For iOS devices, however, split tunneling rules are ignored when using per-app VPN. See also: https://docs.microsoft.com/en-us/mem/intune/protect/microsoft-tunnel-configure#create-a-vpn-profile
Regards, Peter
Hi Peter,
Can you please confirm if internal (intranet) URLs access can be granted using MS Tunnel or MS Tunnel is only available for configuration of Internal apps access but not for internal links (URLs) like http://www.test.abc.com
There is no such MS document saying that how we can access internal links (URLs) using MS Tunnel for enrolled iOS & Android devices.
Hi Itune Admin,
Yes, you can access internal URLs through the Tunnel. The key is that there is a route available from the Tunnel server to the server hosting that URL.
Regards, Peter