This week is a relatively short post that is focused on replacing the Transport Layer Security (TLS) certificate that is used for Microsoft Tunnel. That TLS certificate is used for securing the connection between the mobile devices and the Microsoft Tunnel Gateway and should contain the public name or IP address in its Subject Alternative Name (SAN). Replacing that TLS certificate can be required when the certificate is expired, or when the public name of the Microsoft Tunnel Gateway is changed. Those are a couple of good reasons to replace the TLS certificate. Luckily, those things don’t happen that often, but sadly that also means that it’s always searching for the right actions to perform. This post will walk through the steps that should be performed to replace the TLS certificate on the Microsoft Tunnel Gateway server.
Important: Make sure that the TLS certificate contains the public name or IP address in its SAN.
Note: It’s strongly advised to use a TLS certificate that is publicly trusted. When that’s not possible, make sure to push the entire trust chain to devices using Microsoft Tunnel.
Replacing the TLS certificate on the Linux server
When looking at replacing the TLS certificate on the Microsoft Tunnel Gateway server, the process is luckily pretty straight forward. Basically it comes down to simply copying the new TLS certificate to the right location and running the mst-cli command-line tool with the right parameters. That command-line tool is available on the Linux server – that is running Microsoft Tunnel Gateway – after the installation of Microsoft Tunnel. The following steps walk through the process of replacing the TLS certificate:
Note: The following steps are assuming the use of PFX. When relying on PEM, the private key (.key) has to go to the same folder as mentioned below and the certificate (.crt) has to go to the /etc/mstunnel/certs folder.
- Copy the TLS certificate to the Linux server by using the following command. After running that command, provide the password of the provided user.
scp c:\temp\site.pfx tunneladmin@192.168.20.20:.Note: Make sure to adjust the command to reflect the correct location of the certificate, the correct username and the correct IP address (or DNS name).
- Connect to the Linux server by using the following command. After running that command, provide the password of the provided user.
ssh 192.168.20.20 -l tunneladminNote: Make sure to adjust the command to reflect the correct the correct username and the correct IP address (or DNS name).
- Copy the TLS certificate to the right location on the Linux server by using the following command. After running that command, provide the (sudo) password of the provided user.
sudo cp site.pfx /etc/mstunnel/private- Use the
mst-clicommand-line tool to update the TLS certificate on the Linux server by using the following command. After running that command, provide the password of the certificate.
sudo mst-cli import_cert- Use the
mst-clicommand-line tool to restart the Linux server by using the following command.
sudo mst-cli server restartNote: After walking through these steps, the TLS certificate will be replaced. For a clean result, don’t forget that the TLS certificate was copied to the Linux server to a temporary location. Use the rm command to remove it.
Verifying the successful replacement of the TLS certificate
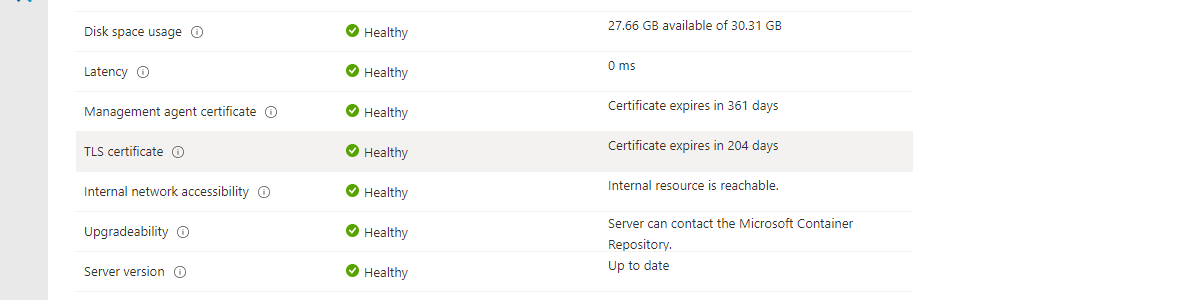
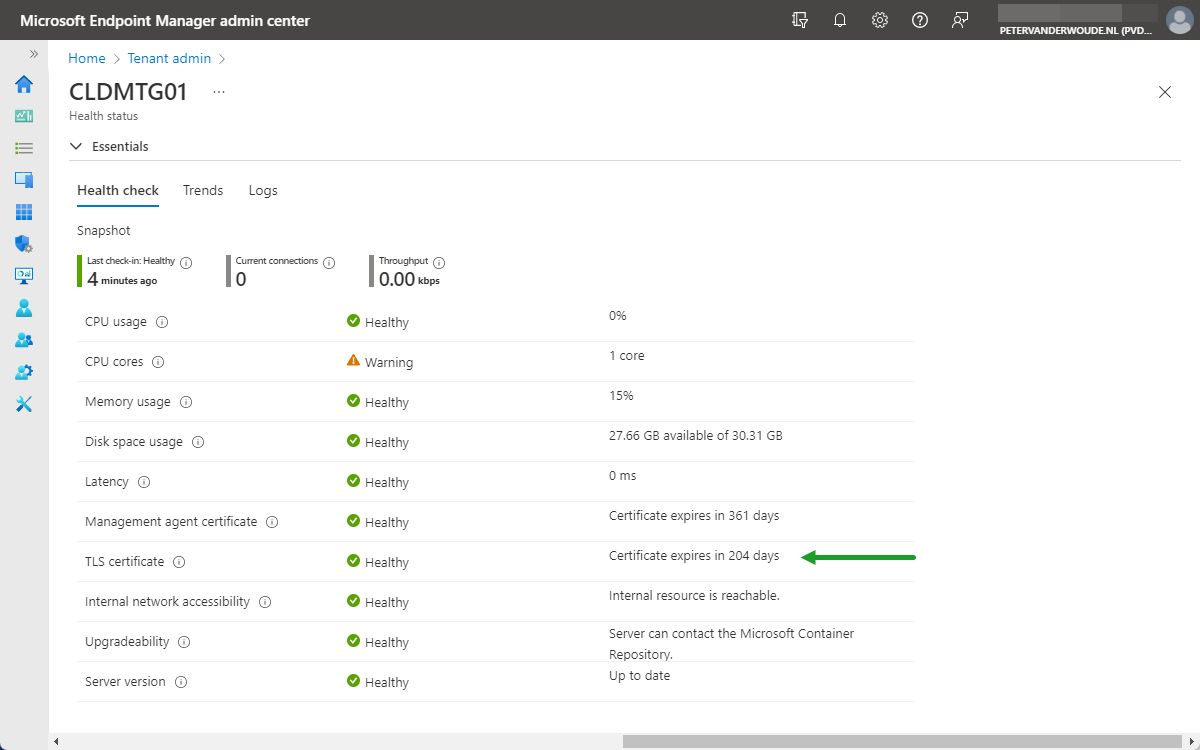
After replacing the certificate, by walking through the mentioned commands, and no failures occurred, it is pretty save to assume that everything went fine. However, there is nothing better than an extra check. To verify a successful TLS certificate replacement, there are two main locations to check: 1) the Tenant admin section in the Microsoft Endpoint Manager admin center portal and 2) the /etc/mstunnel/certs location on the Microsoft Tunnel Gateway server. The easiest place, is the portal. Below, in Figure 1, is an overview of the Health status of a Microsoft Tunnel Gateway server and that includes the expiration date of the TLS certificate.
More information
For more information about Microsoft Tunnel and per-app VPN, refer to the following docs.