This week is all about a few newly introduced features to discourage data leakage specifically for Windows 365. Within the Microsoft 365 solution there are many different options for protecting data. On the data itself as well as platform specific options. Windows 365 is the latest platform that can be added to that list with platform specific solutions. Windows 365 recently introduced screen capture protection that can be used to discourage leaking data by preventing it from being captured. Besides that, it also introduced watermarking that can be used to discourage leaking data by adding a watermark to the desktop that can be traced to the session or desktop of the user. Different solutions, for different scenarios. This post will start by briefly introducing both features, followed with the steps to configuring both features. This post will end with the user experience.
Important: For both features to discourage data leakage, it is important that the feature is supported by the client.
Note: When looking at discouraging data leakage, also make sure to disable clipboard, drive, and printer redirection.
Configuring the data leakage prevention options for Windows 365
When looking at configuring the different options for discouraging data leakage for Windows 365, it starts with a short introduction about the available configuration options. The screen capture protection option can be used to prevent data from being captured in the session. That can be achieved (1) by blocking screen capture on the client, or (2) by blocking screen capture on the client and the server. The first option will prevent screen capture from applications on the local device. And the second option will do the same, but also prevents screen capture from tools and services within the Cloud PC. That does, however, still leave the ability open to simply take a picture with a camera. That’s were watermarking comes into the picture. Watermarking will add QR-codes to the desktop that are always very visible. Of course, that doesn’t literally prevent the user from taking a picture. but it does make a lot less attractive. Especially to actually share that picture, as the QR-code can be related to the session or device of the user.
Note: When screen capture protection is enabled that also prevents users from sharing their screen through collaboration tools such as Microsoft Teams.
Screen capture protection can be configured by using the Enable screen capture protection setting and watermarking can be configured by using the Enable watermarking setting. Both settings are available in the Settings Catalog and are ADMX-backed via terminalserver-avd.admx. The following eight steps walk through the creation of a Settings Catalog profile that contains the required settings for configuring the different features for discouraging data leakage.
- Open the Microsoft Intune admin center portal and navigate to Devices > Windows > Configuration profiles
- On the Windows | Configuration profiles blade, click Create > New Policy
- On the Create a profile blade, provide the following information and click Create
- Platform: Select Windows 10 and later to create a profile for Windows 10 devices
- Profile: Select Settings catalog to select the required setting from the catalog
- On the Basics page, provide the following information and click Next
- Name: Provide a name for the profile to distinguish it from other similar profiles
- Description: (Optional) Provide a description for the profile to further differentiate profiles
- Platform: (Greyed out) Windows 10 and later
- On the Configuration settings page, perform the following actions and click Next
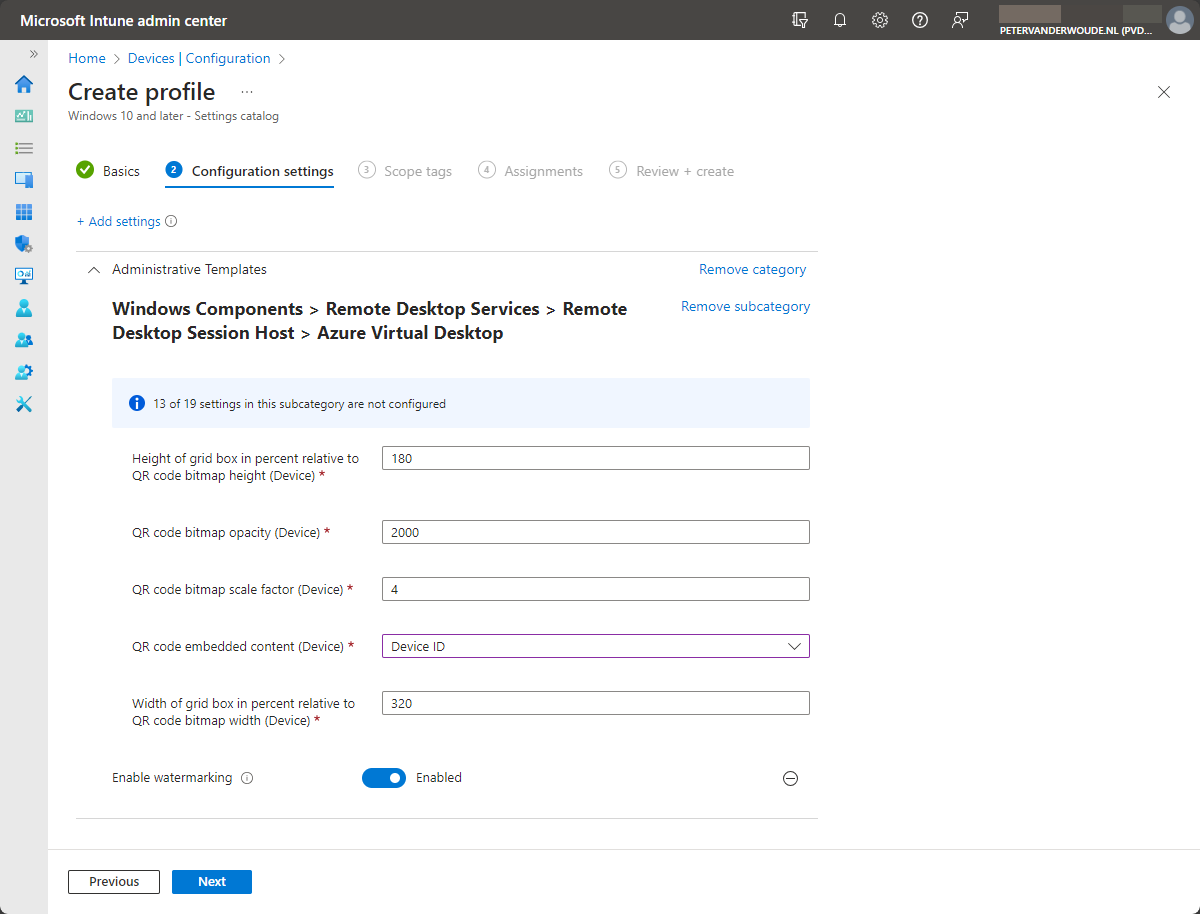
- For configuring watermarking, as shown below in Figure 1
- Click Add settings and perform the following in Settings picker
- Select Administrative Templates > Windows Components > Remote Desktop Services > Remote Desktop Session Host > Azure Virtual Desktop as category
- Select Enable watermarking as setting
- Switch the slider with Enable watermarking to Enabled and configure the following settings
- Use Height of grid box in percent relative to QR code bitmap height to specify the height (100 to 1000)
- Use QR code bitmap opacity to specify the opacity (100 to 9999)
- Use QR code bitmap scale factor to specify the scale (1 to 10)
- Use QR code embedded content to select the embedded content of either the device ID or connection ID
- Use Width of grid box in percent relative to QR code bitmap width to specify the width (100 to 1000)
- Click Add settings and perform the following in Settings picker
- For configuring screen capture protection, as shown below in Figure 2
- Click Add settings and perform the following in Settings picker
- Select Administrative Templates > Windows Components > Remote Desktop Services > Remote Desktop Session Host > Azure Virtual Desktop as category
- Select Enable screen capture protection as setting
- Switch the slider with Enable screen capture protection to Enabled and after that switch the slider with Screen Capture Protection Options to Block screen capture on client to block screen capture
- Click Add settings and perform the following in Settings picker

- On the Scope tags page, configure the required scope tags and click Next
- On the Assignments page, configure the assignment and click Next
- On the Review + create page, verify the configuration and click Create
Note: The order of the settings looks still really funny when enabling the different sliders.
Experiencing the data leakage prevention options on Windows 365
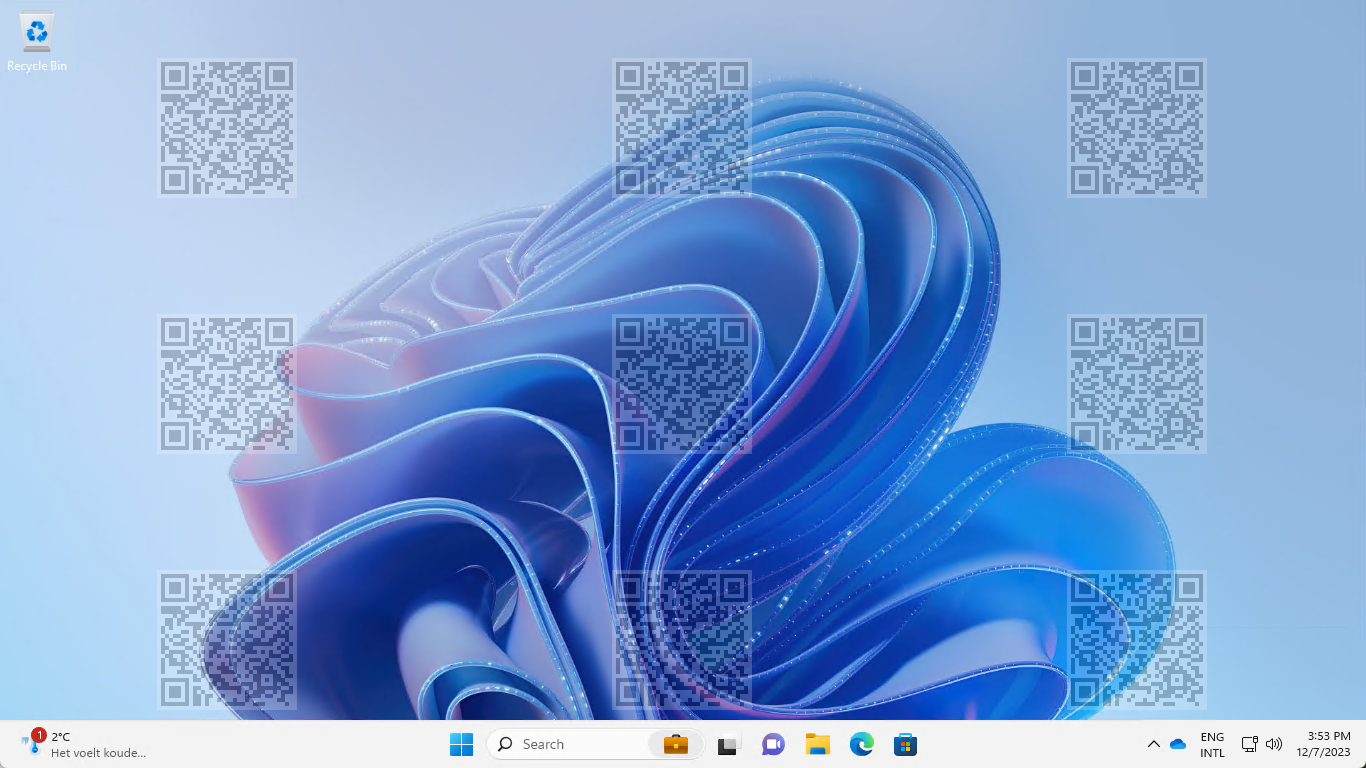
When the different options for discouraging data leakage are configured, it’s time to have a look at the experience. And that experience is really simply to verify. Especially the QR-code with the watermarking. Simply connect to the Cloud PC from a client that supports watermarking and see what happens. That experience is shown below in Figure 3. The desktop of the Cloud PC is covered with multiple QR-code that will make it relatively easy to track any pictures that are taking from the screen. Just try the QR-code in this example and see that it simply translates to the device ID of this Cloud PC. Make sure to carefully plan the usage of this feature, as it can be really much for a user to work with on a daily basis.
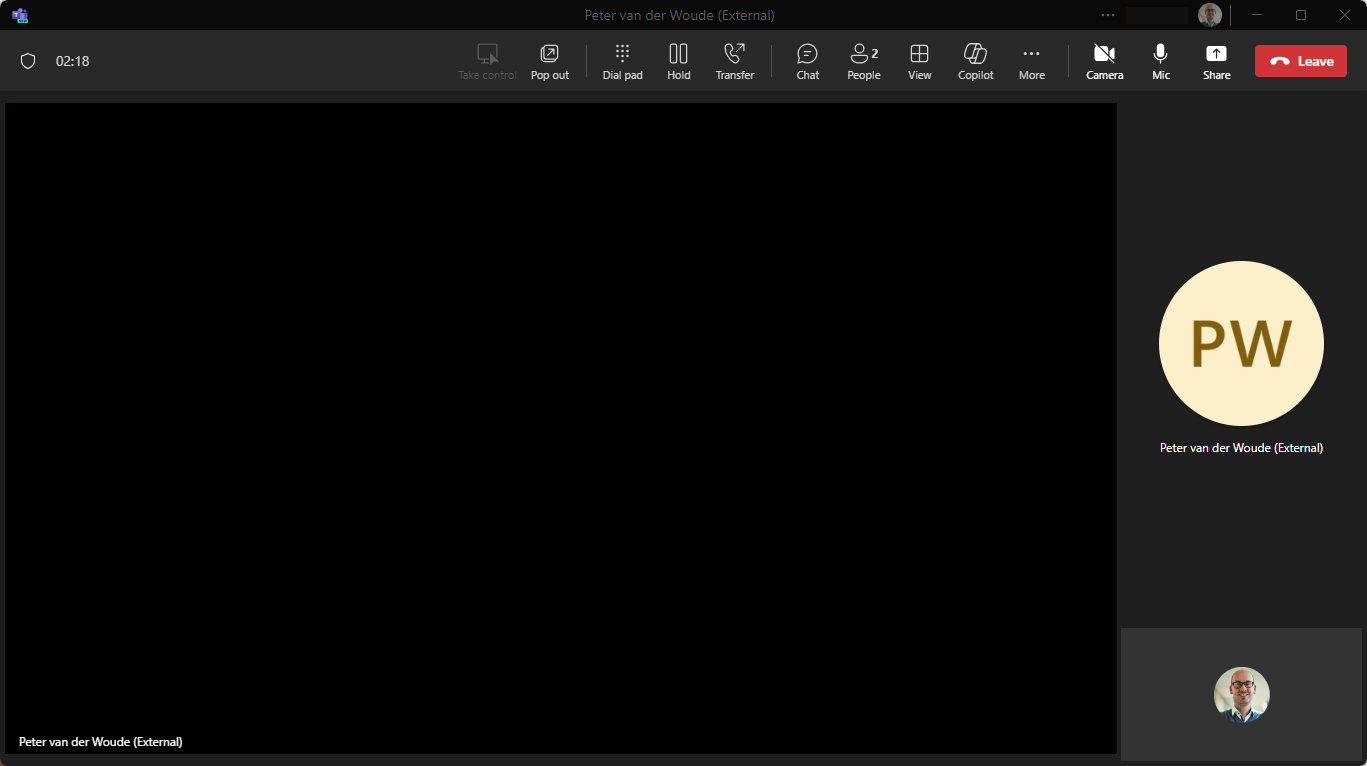
The milder option of screen capture protection can also be experienced relatively easy. And even in different ways. One of those ways is to simply share the desktop of the Cloud PC during a Teams meeting. That experience is shown below in Figure 4. The desktop of the Cloud PC will be completely black. Nothing more, nothing less.
More information
For more information about preventing data leakage specifically on Windows 365, refer to the following docs.
4 thoughts on “Discouraging data leakage on Windows 365”