This week is all about a new enrollment feature for iOS/iPadOS devices. That feature is web-based device enrollment. Web-based device enrollment is now one of the two device enrollment methods that is available for personal iOS/iPadOS devices. The other method is the already existing device enrollment with the Company Portal app. The main differentiator for web-based device enrollment is that it provides a faster and more user-friendly enrollment experience. It’s no longer required to first download the Company Portal app. Instead the user can just go to the Company Portal website, or start the new enrollment experience via an app that requires a compliant device. More user-friendly and accessible via the favorite browser of the user. Besides that, web-based device enrollment can be used in combination with Just-In-Time (JIT) registration, to reduce the number of times users have to sign in. Both, during the enrollment and when accessing apps. This post will walk through the advised configurations to fully utilize the potential of web-based device enrollment for iOS devices. That starts with the configuration of JIT, followed with the configuration of web-based device enrollment and the distribution of the Company Portal website. It all ends with the user experience.
Note: It’s strongly advised to at least distribute the Company Portal app as a web clip, to provide the user with easy access to the device (compliance) status and company status.
Configuring just-in-time registration
When looking at the best user experience, the configuration of web-based device enrollment starts with JIT. JIT greatly enhances the user experience. Especially after the enrollment of the device, as it reduces the authentication prompts during the session and establishes single sign-on (SSO) across all supported (and configured) apps. Besides that, it also provides the technical functionality to fully integrate compliance checks within Microsoft apps (and non-Microsoft apps configured with the Apple SSO extension). To provide all that functionality, JIT utilizes the Apple SSO extension. To configure JIT registration, a Device features profile can be used. The following eight steps walk through the minimal required configuration.
- Open the Microsoft Intune admin center portal and navigate to Devices > iOS/iPadOS > Configuration profiles
- On the iOS/iPadOS | Configuration profiles blade, click Create profile
- On the Create a profile blade, provide the following information and click Create
- Platform: Select iOS/iPadOS to create a profile for iOS and iPadOS devices
- Profile type: Select Templates > Device features to configure the required setting
- On the Basics page, provide the following information and click Next
- Name: Provide a name for the profile to distinguish it from other similar profiles
- Description: (Optional) Provide a description for the profile to further differentiate profiles
- Platform: (Greyed out) iOS/iPadOS
- Profile type: (Greyed out) Device features
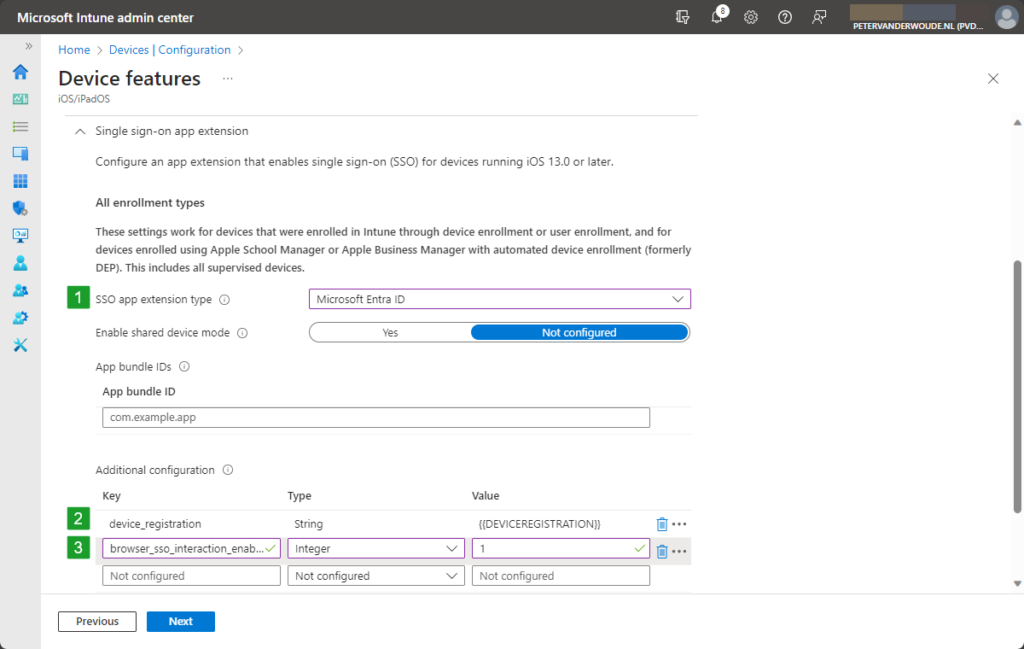
- On the Configuration settings page, as shown below in Figure 1, perform at least the following actions and click Next
- Navigate to Single sign-on app extension and configure the following settings
- With SSO app extension type select Microsoft Entra ID as type
- With Additional configuration add at least the following key-value pairs
- Configure browser_sso_interaction_enabled as key, of the Integer type, with the value 1, to enable SSO within Safari
- Configure device_registration as key, of the String type, with the value {{DEVICEREGISTRATION}}, to facilitate JIT
- On the Scope tags page, configure the required scope tags and click Next
- On the Assignments page, configure the assignment and click Next
- On the Review + create page, verify the configuration and click Create
Note: This is the same configuration that can also be used for the Account driven user enrollment for personal devices and the Setup Assistant with modern authentication enrollment for company devices.
Configuring web-based device enrollment profile
When looking at the web-based device enrollment functionality itself, it all starts with the enrollment profile. That enrollment profile triggers the right enrollment experiences on the device and allows the usage of Safari for the enrollment. The following six steps walk though the creation of that enrollment profile.
- Open the Microsoft Intune admin center portal and navigate to Devices > iOS/iPadOS > iOS/iPadOS enrollment > Enrollment types
- On the Enrollment type profiles blade, click Create profile > iOS/iPadOS
- On the Basics page, provide a valid name to distinguish it from other similar profiles and click Next
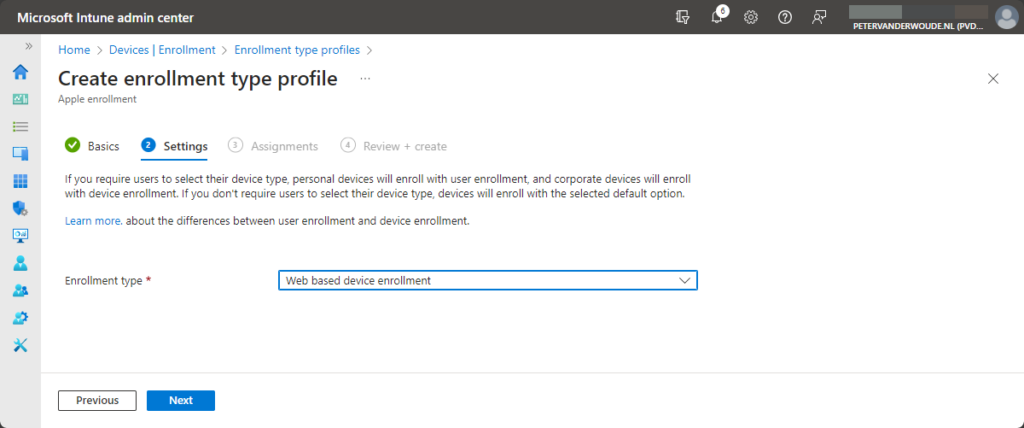
- On the Settings page, as shown below in Figure 2, select Web based device enrollment as enrollment type and click Next
- On the Assignments page, configure the assignment and click Next
- On the Review + create page, verify the configuration and click Create
Note: When multiple enrollment profiles are available, use the priority to determine the order of those profiles.
Distributing Company Portal website
As users no longer need to have the Company Portal app, it is strongly advised to at least provided them with a link to the Company Portal website. That will provide those users with a relatively easy method for access potential apps and for looking at the device status. The easiest method to achieve that is by pushing a web clip to those users.
- Open the Microsoft Intune admin center portal and navigate to Apps > iOS/iPadOS
- On the iOS/iPadOS | iOS/iPadOS apps blade, click Add > iOS/iPadOS web clip
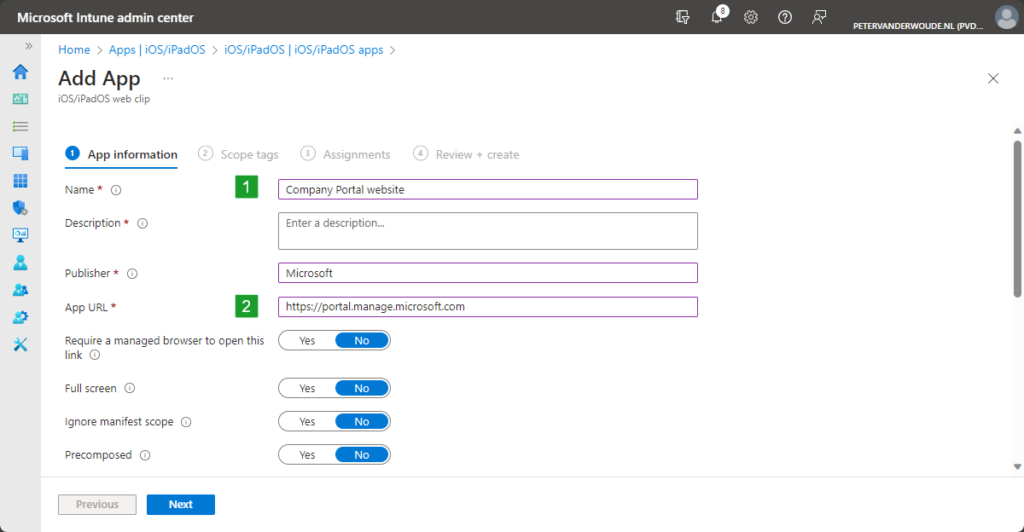
- On the App information page, as shown below in Figure 3, provide at least the following information and click Next
- Name: Provide a unique name for the web clip to distinguish it from other apps
- Description: Provide a description for the app to describe the purpose of the web clip
- Publisher: Provide the publisher of the web clip
- App URL: Specify https://portal.manage.microsoft.com/ as the address for the web clip
- On the Scope tags page, configure the required scope tags and click Next
- On the Assignments page, configure the assignment and click Next
- On the Review + create page, verify the configuration and click Create
Note: For better visibility, and less support calls, it’s also strongly advised to configure an icon with the web clip.
Experiencing web-based device enrollment
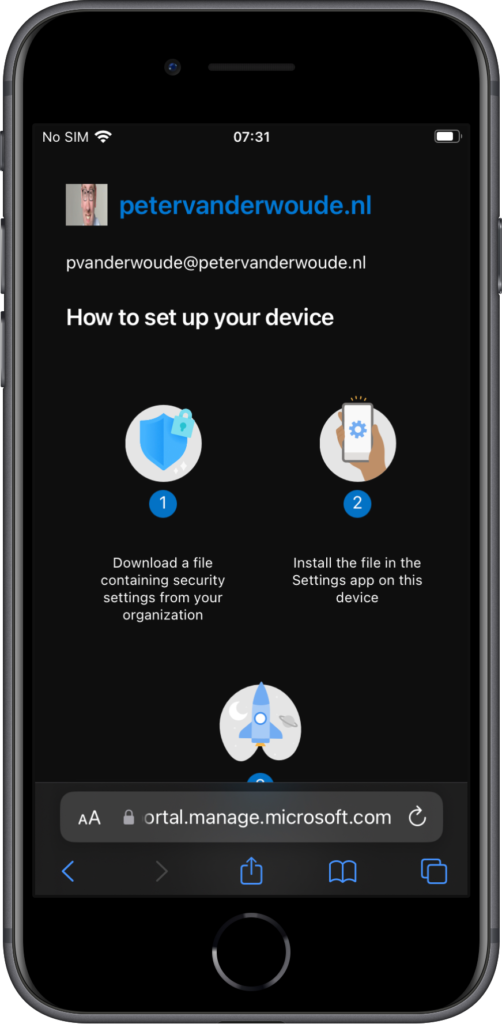
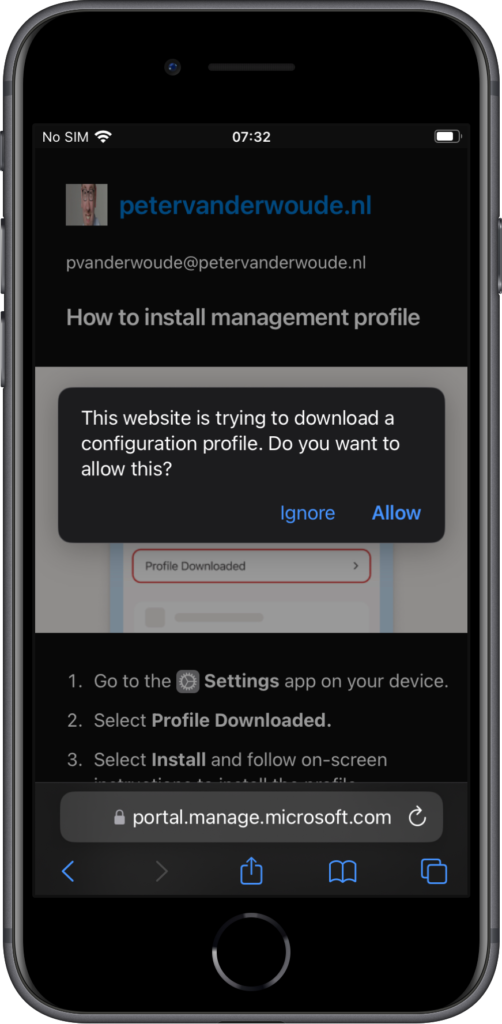
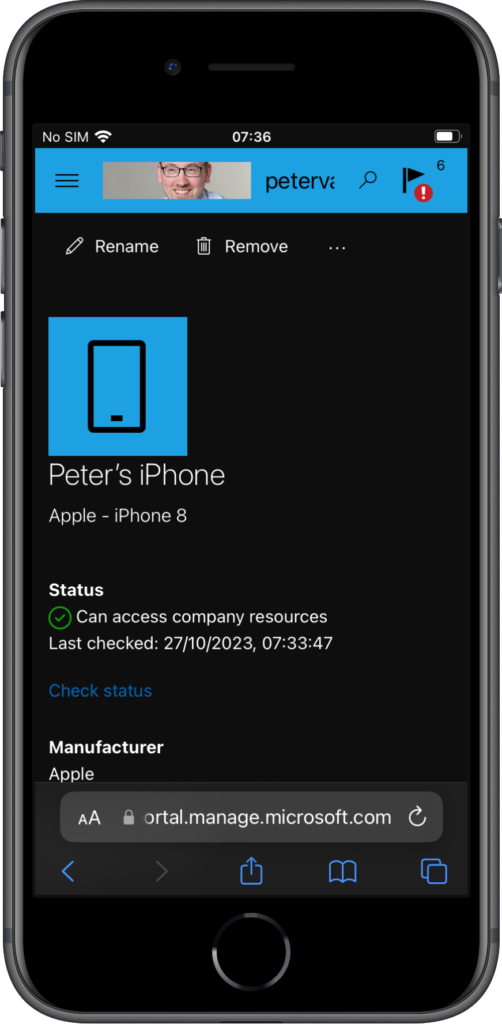
When the different configurations are in place, it’s relatively easy to experience the web-based device enrollment. Before starting, however, it is strongly advised to first install the Microsoft Authenticator app. The web-based device enrollment experience can be triggered by directly navigating to the URL, or by signing in to an app that requires device management. Either way, the user will end-up in the browser with the steps to set up the device (as shown below in Figure 4). Scroll a bit down and click Get started. That will bring the user to the next page explaining the management profile installation (as shown below in Figure 5). The user can simply click Allow and go to the Settings app to install the management profile. Once the management profile is installed, the device will eventually show up in the Company Portal website as a managed and compliant device. Also, when now starting the Teams app, for example, for the first time, it will shown an additional screen about check the device.
Note: At the moment of writing, the enrollment flow in the Company Portal website would still redirect to the Company Portal app. To trigger the web-based device enrollment flow, the direct URL can be used.
More information
For more information about web based device enrollment for iOS devices, refer to the following docs.

Where does the Microsoft Authenticator app come into play with this enrollment method? Is it required for web-based enrollment to work?
Hi Terry,
The SSO extension comes with the Authenticator app.
Regards, Peter
Hello, thank you very much.
I have the following problem:
I’ve created and assigned the enrollment type profile. Login via https://portal.manage.microsoft.com/enrollment/webenrollment/ios works, after clicking on “get started” I get an error: “Couldn’t add your device, your Admin has not enabled Web Desive Enrollment for this account. Contact your admin….”
Hi Manual,
Are both profiles applicable to the user?
Regards, Peter
I don’t understand the purpose of this web based enrollment method if we still need to have the company portal app pushed as web-clip for compliance checks!
It’s a much faster user experience, as you don’t have to wait for that anymore during the enrollment.
Regards, Peter
If we do not push the company portal web clip, how does the compliance check happen? Via the MDM profile?
Hi Chetan,
The web clip is only there to provide easy insights about the device and to (remotely) manually trigger for example the compliance check.
Regards, Peter
Hi Peter,
I wonder if this is closer to User enrollment or device enrollment.
I can’t find it in the doc, since the user enrolls kind of split the device in 2, while device is full-on management.
where would Web-Enrollment fall ?
thanks
Jonathan
Hi Jonathan,
It’s device enrollment.
Regards, Peter
Hi Peter,
is it possible that the login for SSO like described by you is always asking when accessing Outlook / Teams etc.?
When I’m accessing Outlook or Teams that you are redirected automatically to the Web-Enrollment?
At the moment I can login but is not redirected to the configured URL.
Thank you.
Regards,
Matthew
Hi Matthew,
What do you exactly mean? You mean once a device is already enrolled?
Regards, Peters
Hi Peter,
did you have the confusing Situation, that a iOS device with web based device enrollment profile would enroll as a Company Device instead of a personal one ? I did and I have no idea why, because the Ownership should be always Personal with that Profile. We don’t have CI.
Hi Christian,
Not that I can remember. Are all your devices enrolling as personal device?
Regards, Peter
Hi Peter,
no unfortunately not. That’s actually the Problem. Some Devices have after they are enrolled to Intune with the web based device enrollment Profile the ownership set to company some of them personal. But shouldn’t all the devices set to personal?
Hi Christian,
I see that I formulated my question a bit weird. Yes, all should be enrolled as personal devices when using web-based device enrollment. If you’re not seeing that, you might want to contact Microsoft to see what’s happening there. One last thing to double check is that you haven’t configured any corporate device identifiers.
Regards, Peter
Hi Peter,
thank you for your message.
As mentioned in the first Comment no CI has been added in Intune.
At least i can rule out that this is a expected behaviour.
Ok, i will contact MS to solve the issue.
Best regards
Peter, What is your opinion on this from MS?
Plan for Change: Microsoft Intune ending support for User Enrollment with Company Portal for iOS/iPadOS
With the upcoming release of iOS/iPadOS 18, Apple will no longer support profile based User Enrollment. Due to these changes, Intune will end support for Apple User Enrollment with Company Portal shortly after the release of iOS/iPadOS 18. We recommend enrolling devices with account driven User Enrollment for similar functionality and an improved user experience.
How this will affect your organization:
After Intune ends support for User Enrollment with Company Portal:
1. Existing enrolled devices are not impacted.
2. Users will not be able to enroll devices if they are targeted with this enrollment type profile.
3. Intune technical support will only be provided for existing devices enrolled with this method. We will not provide technical support for any new enrollments.
What you need to do to prepare:
Use an alternate management method for enrolling devices. We recommend account driven User Enrollment for similar functionality and an improved user experience. For those looking for a simpler enrollment experience, try the new web based device enrollment for iOS/iPadOS.
Additional information:
Overview of Apple User Enrollment in Microsoft Intune
Hi Mat,
It’s a change by Apple that Microsoft basically has to follow. Besides that, account-driven Apple User Enrollment is the more evolved version of User Enrollment. So, I would say that it’s a good response on the moves by Apple.
Regards, Peter