This blog post uses the Personalization configuration service provider (CSP) to manage the desktop and lock screen image on Windows 10 devices. This CSP was added in Windows 10, version 1703, which is currently available as Insider Preview build.
This blog post is about the ability to easily configure separate images for the desktop and the lock screen on Windows 10 devices. Before Windows 10, version 1703, this was possible by using an MSI or by using the EnforceLockScreenAndLogonImage setting. However, the latter setting was only able to configure the lock screen image and not the desktop image. Windows 10, version 1703, introduces the Personalization CSP, which enables the administrator to manage the desktop and lock screen image. In this post I’ll briefly go through the available settings in the Personalization CSP and I’ll show how to configure the desktop and lock screen image via Microsoft Intune hybrid and Microsoft Intune standalone. I’ll end this post by showing the end-user experience.
Configuration
Now let’s start with the configuration. Like last week I’ll split the configuration in two sections. The first section is about the available settings in the Personalization CSP and the second section is about the configuration of the desktop and lock screen image.
Available settings
As the Personalization CSP is new in Windows 10, version 1703, I thought it would be good to briefly go through the available settings. The root node for the Personalization CSP is ./Vendor/MSFT/Personalization and it contains the following settings.
| Setting | Description |
| DesktopImageUrl | This setting allows the administrator to specify an image to be used as desktop image. |
| DesktopImageStatus | This setting allows the administrator to query the status of the desktop image. |
| LockScreenImageUrl | This setting allows the administrator to specify an image to be used as lock screen image. |
| LockScreenImageStatus | This setting allows the administrator to query the status of the lock screen image. |
Configure settings
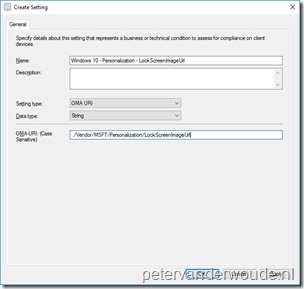
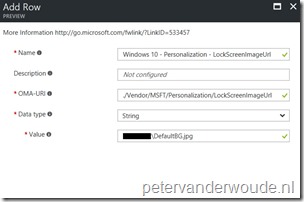
After going through the available settings in the Personalization CSP, it’s good to know that only the DesktopImageUrl and the LockScreenImageUrl are configurable settings. The other two settings can only be used to query the status. To configure the desktop and lock screen image, the following OMA-URI configurations can be used (in both cases the data type and value are the same):
- OMA-URI – Desktop image: ./Vendor/MSFT/Personalization/DesktopImageUrl
- OMA-URI – Lock screen image: ./Vendor/MSFT/Personalization/LockScreenImageUrl
- Data type: String
- Value: [<PATH>\<FILE>]
- In this value <PATH> can be a http(s) url, or a file url;
- In this value <FILE> can be a jpg, jpeg or png image.
This configuration information can be used in Microsoft Intune hybrid and Microsoft Intune standalone, by using the configuration guidelines shown below.
End-user experience
As usual, let’s end this post with the end-user experience. Before really going to the end-user experience, it’s good to show an easy method to verify the configuration. The configuration can be verified In the registry, at HKEY_LOCAL_MACHINE\SOFTWARE\Microsoft\Windows\CurrentVersion\PersonalizationCSP. At this location it shows the url and the status of the desktop and lock screen image. Even better, it also show the local path of both images. In other words, whether the image is local, or remote, it will always be cached and used from a local location, as shown below.
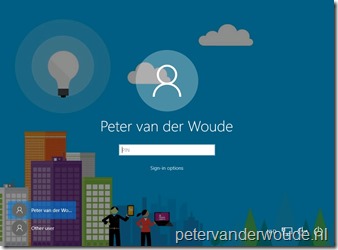
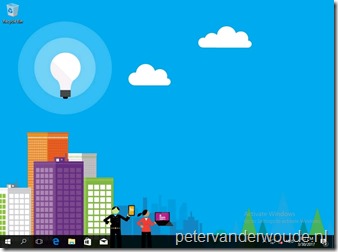
The real end-user experience is, of course, not in the registry. The real en-user experience can be easily found when logging on to the configured Windows 10 device. The desktop image will be configured, as shown below on the right, and the lock screen image will be configured, as shown below on the left.
 |
 |
More information
For more information about the Personalization CSP, please refer to this article about the Personalization CSP.


