This blog post is about a pre-release feature, which means that it’s included in the product for early testing in a production environment, but should not be considered production ready.
This week a blog post about the Windows Store for Business Integration feature that is introduced in ConfigMgr 1606. This feature is introduced as a pre-release feature. Before starting with the configurations of this blog post., make sure to sign up for Windows Store for Business here.
Introduction
The Windows Store for Business is where organizations can find and purchase Windows apps. By connecting the Windows Store for Business to ConfigMgr, organizations can synchronize the list of apps with ConfigMgr, view these in the ConfigMgr administration console, and deploy them like any other app. The Windows Store for Business supports two types of licensed app:
- Online – This license type requires users and devices to connect to the Windows Store for Business to get an app and its license. It requires Windows 10 devices to be Azure AD domain-joined;
- Offline – This license type enables organizations to cache apps and licenses to deploy them directly within their on-premises network, without connecting to the Windows Store for Business or having a connection to the Internet.
It’s also good to know that ConfigMgr supports managing Windows Store for Business apps on Windows 10 devices running the ConfigMgr client and Windows 10 devices that are enrolled via MDM.
Note: At this moment there is no support for paid apps from the Windows Store for Business.
Configuration
Now lets have a look at the actual configurations. The configuration requires the following four steps to synchronize the Windows Store for Business with ConfigMgr.
Step 1: Enable pre-release feature in ConfigMgr
The first step is to enable the Windows Store for Business integration pre-release feature, as it must be turned on in ConfigMgr. This can be achieved by performing the following steps.
| 1 | First open the Configuration Manager administration console and navigate to Administration > Overview > Site Configuration > Sites; |
| 2 | Select the top-level site in the hierarchy and select Hierarchy Settings, in the Home tab, to open the Hierarchy Settings Properties; |
| 3 | In the Hierarchy Settings Properties, navigate to the General tab, select Consent to use Pre-Release features and click OK; |
| 4 | Now navigate to Administration > Overview > Cloud Services > Updates and Servicing > Features; |
| 5 | Right-click Windows Store for Business integration and select Turn on. |
Step 2: Register ConfigMgr as web application in Azure AD
The second step is to create an application in Azure AD. That application doesn’t have to contain resolvable URLs, as it only will be used to create a link between the Windows Store for Business and ConfigMgr. This can be achieved by performing the following steps.
| 1 | In the Azure Management portal, select the related Azure AD and click APPLICATIONS > ADD to open the What do you want to do? dialog box; |
| 2 | In the What do you want to do? dialog box, click Add an application my organization is developing to open the ADD APPLICATION wizard; |
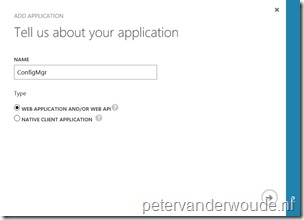
| 3 |
|
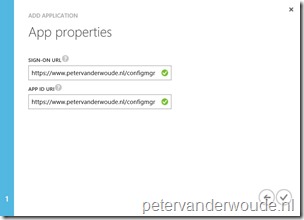
| 4 |
Note: In both cases the URL doesn’t have to be a resolvable address. |
| 5 | In the created app click CONFIGURE; |
| 6 |
Note: The key will be created after clicking SAVE and can only be retrieved while on this page |
Step 3: Configure ConfigMgr as management tool in the Windows Store for Business
The third steps is to configure the Azure AD app as a management tool in the Windows Store for Business. This will create a link between the Azure AD app and the Windows Store for Business, which will allow us to connect ConfigMgr to the Windows Store for Business. This can be achieved by performing the following steps.
| 1 | In the Windows Store for Business portal, select Settings > Management tools; |
| 2 | On the Management tools page, click Add a management tool to open the Add a management tool dialog box; |
| 3 | 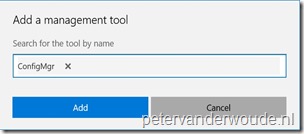 On the Add a management tool dialog box, search for the just created and configured app and click Add to return to the Management tools page; On the Add a management tool dialog box, search for the just created and configured app and click Add to return to the Management tools page; |
| 4 |
Note: Only one management tool can be active for the Windows Store for Business. |
Step 4: Add Windows Store for Business account to ConfigMgr
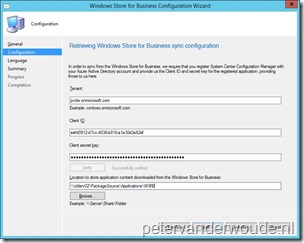
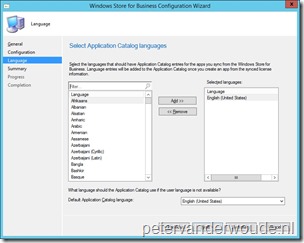
The fourth steps is to add the Windows Store for Business account to ConfigMgr. This will create a link between the Windows Store for Business and ConfigMgr by using the information of the Azure AD app. This can be achieved by performing the following steps.
Administrator experience
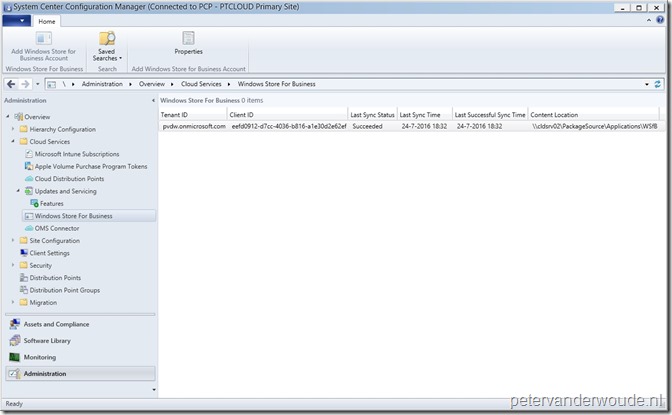
After the configuration is completed the administrator can view the sync status and the configuration details in the administration console via Administration > Overview > Cloud Services > Windows Store for Business.
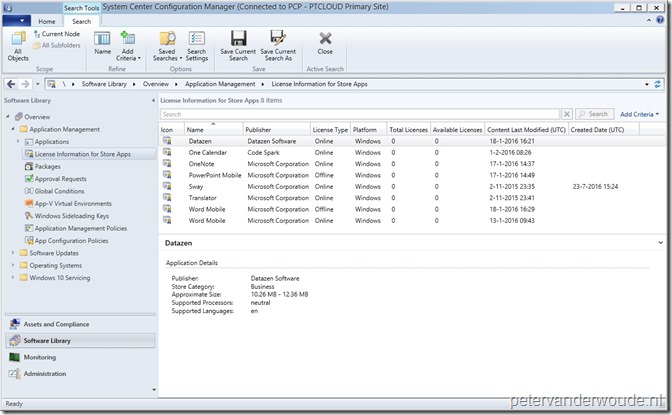
Once the synchronization is completed the administrator can view the synchronized apps in the administration console via Software Library > Overview > Application Management > License Information for Store Apps.
This is also the location where the administrator can create applications based on the information synchronized from the Windows Store for Business. This can be achieved by simply selecting an application from the list and clicking Create Application.
More information
For more information about managing apps from the Windows Store for Business, please refer to this article about Manage apps from the Windows Store for Business with System Center Configuration Manager.


Is it true that the Online Scenario requires the device to be Azure AD joined? Please check that again, I have done it quite often without it. You need to have an Azure AD Account, that’s true, but only logging into the Store should be enough. Or does that change when working with ConfigMgr?
I haven’t specifically tested it without Azure AD join, but I can imagine that it’s a requirement specifically to this scenario. As you need to target the deployment to something known by ConfigMgr and the Windows Store for Business.
That specific requirement is also mentioned in the documentation here: https://technet.microsoft.com/en-us/library/mt740630.aspx
I have followed this guide – but Sync status fields are still blank.
How are the sync action triggered and can I trigger it manually?
The sync will be triggered automatically and can’t be forced at this moment. Is it still not synchronizing?
Can windows Store for business be connected to multiple SCCM environments
Hi Simon,
I can’t find a definitive answer on that. Having said that, even if it would be (technically) possible I don’t see how it would (functionally) work. Think about licenses for instance. Multiple places with multiple counts.
Regards, Peter