
This week is all about a new security feature that is part of Microsoft Defender SmartScreen and that was introduced with Windows 11, version 22H2. That feature is enhanced phishing protection. Enhanced phishing protection helps with protecting work accounts against phishing and unsafe usage on sites and apps. It works alongside existing Windows security features and alerts about typed work passwords in any Chromium browser, warns about reused work passwords on sites and apps, and warns when storing plaintext work passwords in Notepad, Word, or any Microsoft 365 Office app. That makes enhanced phishing protection an important addition to the Microsoft Defender SmartScreen security functionalities. This post will go through the available settings, the easy configuration, and the user experience with the enabled notifications.
Note: Enhanced phishing protection is available starting with Windows 11, version 22H2 and later.
Introducing the WebThreatDefense policies
When looking at the configuration of enhanced phishing protection in Microsoft Defender SmartScreen, the focus should go to the WebThreatDefense policies in the Policy CSP. Those policy settings can be used for actually configuring enhanced phishing protection by using Microsoft Intune (or any other MDM). The root node of the enhanced phishing protection settings is ./Device/Vendor/MSFT/Policy/Config/WebThreatDefense and that contains the four different settings that can currently be configured. The table below provides an overview of those settings in that node and how those reflect to Microsoft Intune. It provides the setting name (in the node and in Microsoft Intune), the type, the available values and a short description.
| Setting | Type | Value | Description |
|---|---|---|---|
| ServiceEnabled Service Enabled | Integer | 0 - Turn off enhanced phishing protection 1 - Turn on enhanced phishing protection in audit mode | This policy setting can be used to configure enhanced phishing protection in audit mode or off. When in audit mode, users don’t see any notifications for any protection scenarios. It only captures unsafe password entry events and sends telemetry through Microsoft Defender. |
| NotifyMalicious Notify Malicious | Integer | 0 – Turn off these enhanced phishing protection notifications 1 – Turn on these enhanced phishing protection notifications | This policy setting can be used to configure enhanced phishing protection to warn users when they type their work password into a reported phishing site, a login URL with an invalid certificate, or an application connecting to a reported phishing site or a login URL with an invalid certificate. |
| NotifyPasswordReuse Notify Password Reuse | Integer | 0 – Turn off these enhanced phishing protection notifications 1 – Turn on these enhanced phishing protection notifications | This policy setting can be used to configure enhanced phishing protection to warn users when they reuse their work password in any site or app. |
| NotifyUnsafeApp Notify Unsafe App | Integer | 0 – Turns off these enhanced phishing protection notifications 1 – Turns on these enhanced phishing protection notifications | This policy setting can be used to configure enhanced phishing protection to warn users when they type their work passwords in text editor apps, like Notepad, or Word. |
Note: Keep in mind that enhanced phishing protection is enabled by using settings available via the Policy CSP.
Configuring enhanced phishing protection
When looking at applying the enhanced phishing protection configuration in Microsoft Defender SmartScreen, the focus goes to the Settings Catalog. The Settings Catalog contains the described settings and provides an easy method for applying those settings. The following eight steps walk through the configuration of the enhanced phishing protection settings by using the available settings in the Settings Catalog. It configures all the settings that were explained earlier.
- Open the Microsoft Endpoint Manager admin center portal and navigate to Devices > Windows > Configuration profiles
- On the Windows | Configuration profiles blade, click Create profile
- On the Create a profile blade, provide the following information and click Create
- Platform: Select Windows 10 and later to create a profile for Windows 10 devices
- Profile: Select Settings catalog to select the required setting from the catalog
- On the Basics page, provide the following information and click Next
- Name: Provide a name for the profile to distinguish it from other similar profiles
- Description: (Optional) Provide a description for the profile to further differentiate profiles
- Platform: (Greyed out) Windows 10 and later
- On the Configuration settings page, as shown below in Figure 2, perform the following actions and click Next
- Click Add settings and perform the following in Settings picker
- Select SmartScreen > Enhanced Phishing Protection as category
- Select Service Enabled, Notify Malicious, Notify Password Reuse, and Notify Unsafe App as setting
- Configure the selected setting with the following values
- Switch the slider with Service Enabled to Enabled to turn on enhanced phishing protection
- Switch the slider with Notify Malicious to Enabled to turn on notifications for malicious scenarios
- Switch the slider with Notify Password Reuse to Enabled to turn on notifications for password reuse
- Switch the slider with Notify Unsafe App to Enabled to turn on notifications for plaintext passwords
- Click Add settings and perform the following in Settings picker

- On the Scope tags page, configure the required scope tags and click Next
- On the Assignments page, configure the assignment and click Next
- On the Review + create page, verify the configuration and click Create
Note: The enhanced phishing protection settings are available for Windows 11, version 22H2 and later. That availability could be used as a filter for the assignment.
User experience with enhanced phishing protection
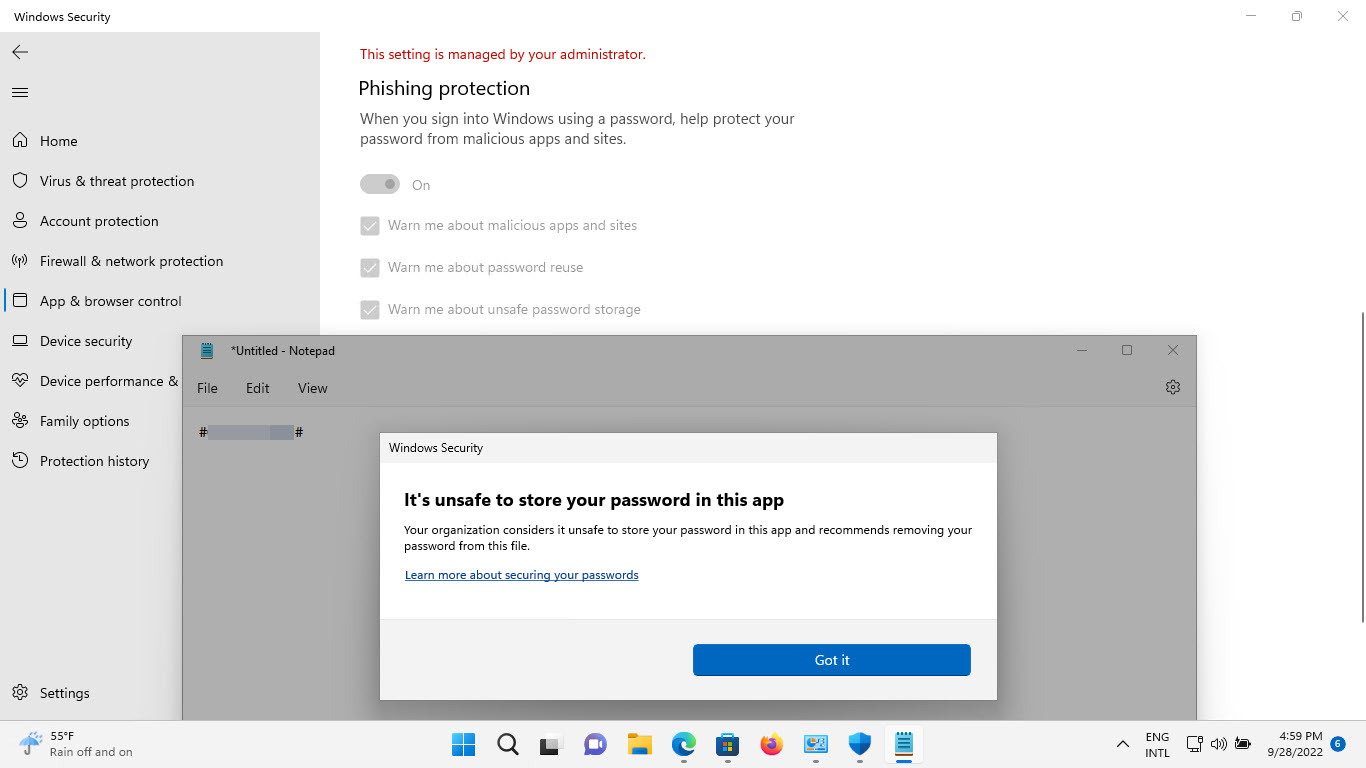
When looking at experiencing enhanced phishing protection, it’s relatively easy to simulate most of the different scenarios that are protection by using enhanced phishing protection. The notification about the unsafe app can be easily triggered by typing the work password in text editor apps, like Notepad (as shown below in Figure 2). That notification will tell the user that it’s unsafe to store the password in that app.
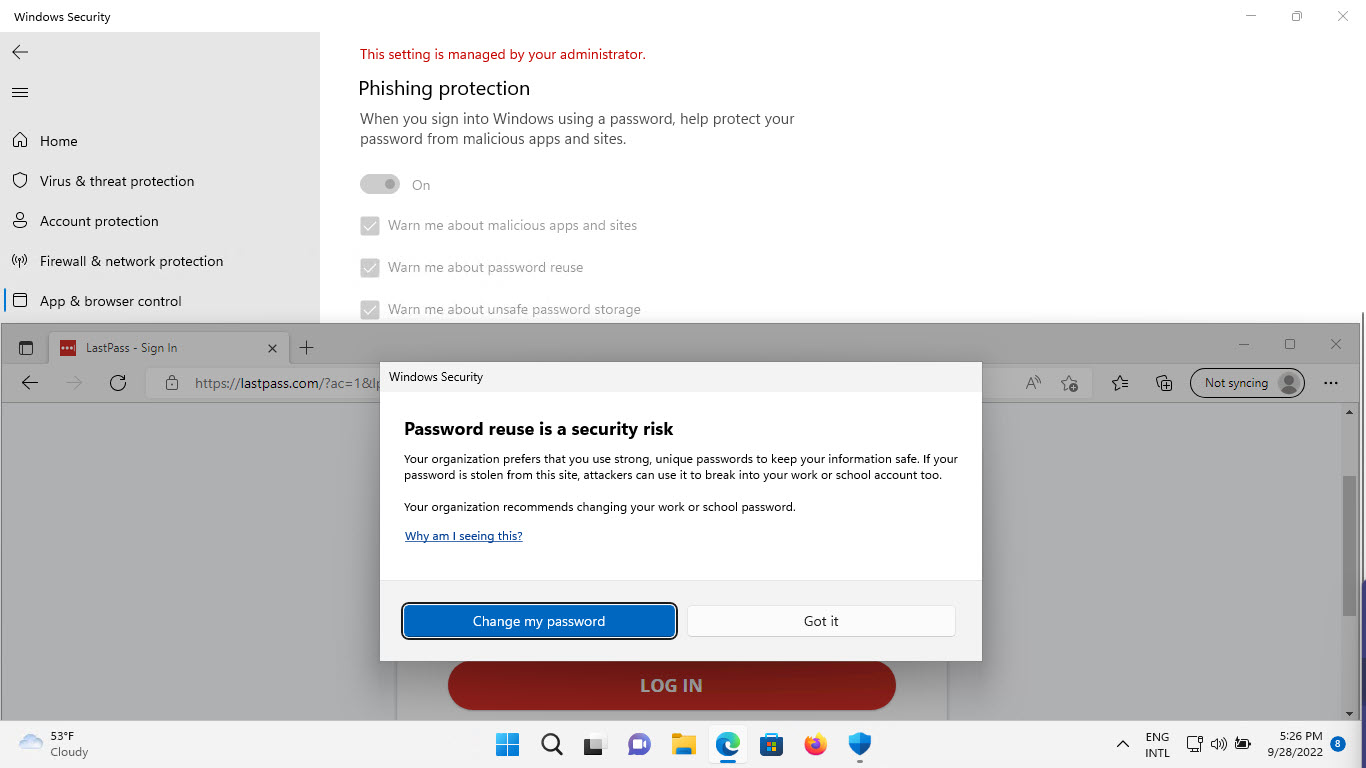
The notification about the reuse of the work password can also be easily triggered. That notification can be triggered by typing the work password in an app, or website, for creating a new account or for simply logging in to an account (as shown below in Figure 3). The notification will tell the user that reusing the password is a security risk.
The notification about the malicious websites is a lot harder to trigger. Especially in combination with Microsoft Defender for Endpoint. Most malicious sites and actions are already blocked. The idea of this notification would be to prevent users from providing their work password in a malicious site.
Besides looking at the user experience with enhanced phishing protection, the notifications are also send as medium alerts to Microsoft Defender for Endpoint. Every notification is shown as a medium alert.
More information
For more information about Enhanced Phishing Protection, refer to the following docs.
It’s too bad there isn’t a whitelist. When someone is using the Microsoft AVD web client and enters their credentials, it pops up the warning message every time.
Hi Pete,
Yes. For (currently) non-functioning SSO-experiences, that would have been a good alternative.
Regards, Peter