
This week is all about authentication contexts. Authentication contexts are another great feature for Condition Access policies. That feature enables IT administrators to further secure data and actions in apps, by providing a step-up authentication. Those apps can be custom apps, SharePoint sites, Privileged Identity Management (PIM), and even apps protected by Microsoft Cloud App Security (MCAS). The focus of this post is on authentication contexts with SharePoint sites. This post starts with an introduction to authentication contexts, followed with the different activities to create authentication contexts, to assign Conditional Access policies to authentication contexts and to tag SharePoint sites with authentication context. This post ends with experiencing authentication contexts.
Important: At the moment of writing, authentication contexts are still public preview. For Azure AD features that means that the feature is provided without a service level agreement, and that the usage of the feature is not recommended for production environments. Besides that, some parts of this feature are still rolling out to the tenants.
Introducing authentication contexts
Authentication contexts basically provide a method to require step-up authentication to further secure data and actions within apps. That step-up authentication provides an additional layer of security and is provided via Conditional Access policies. And that additional layer of security, enables the IT administrator to configure specific scenarios like always requiring MFA, or always requiring a compliant device. Basically anything that can be required via a Conditional Access policy can be an additional access requirement. That additional access requirement can be used in combination with actions like accessing a specific SharePoint site with secret data, or when temporarily activating additional permissions via PIM.
When specifically looking at accessing SharePoint sites and data, it was already possible to use sensitivity labels to manage access to SharePoint sites on unmanaged devices. That would enable the IT administrator to determine the access on unmanaged devices by using sensitivity labels. Actually, in the end the user will determine that by applying a sensitivity label to a SharePoint site. Authentication contexts enable more configuration options for sensitivity labels to enforce restrictions. Instead of configuring the behavior for unmanaged devices, the IT administrator can now also add an authentication context to a sensitivity label.
The authentication context that is added to a sensitivity label, will trigger an additional Conditional Access policy. The step-up authentication. So, imagine a user that is already signed in and working in a normal SharePoint site. That user now wants to access a secure SharePoint site that is tagged with an authentication context. That authentication context triggers an additional Conditional Access policy, with additional requirements, for accessing that secure SharePoint site. That basically means that the user needs to retrieve a new token for accessing that secure SharePoint site.
Creating authentication contexts
When looking at the configuration, the first action is to create an authentication context. That authentication context can be used for the assignment of Conditional Access policies and for tagging SharePoint sites. The creation of an authentication context can be achieved by following the next three steps.
- Open the Microsoft Endpoint Manager admin center portal navigate to Endpoint security > Conditional Access > Authentication context, or open the Azure portal and navigate to Azure Active Directory > Security > Conditional Access > Authentication context
- On the Conditional Access | Authentication context page, click New authentication context
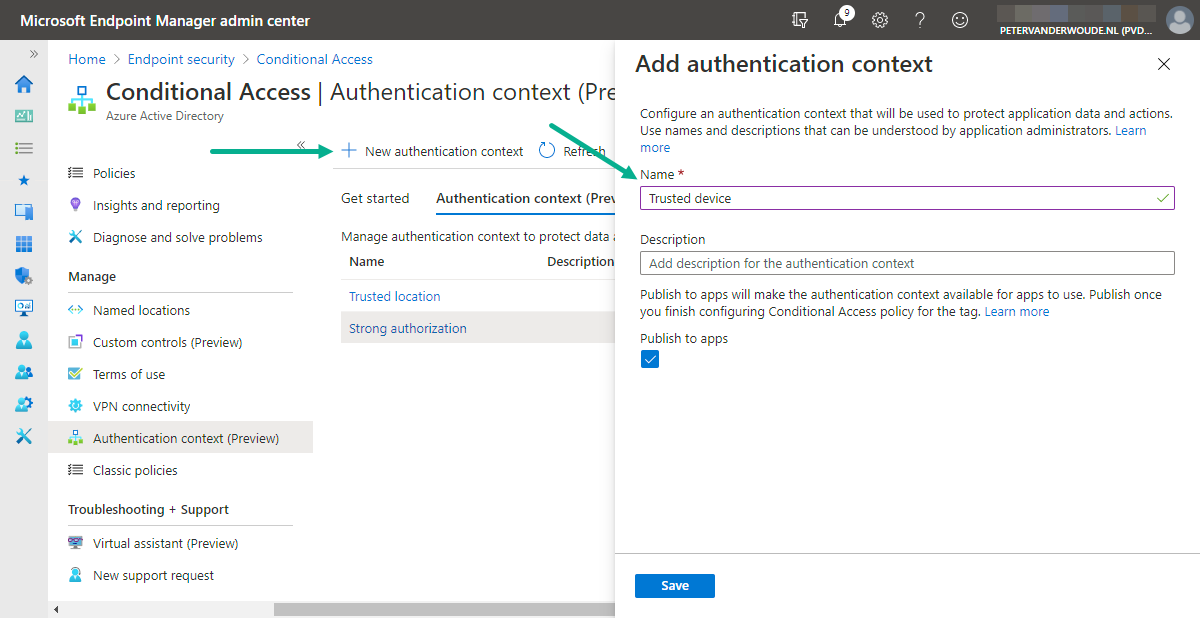
- On the Add authentication context blade, as shown below in Figure 1, specify the following information and click Save
- Name: Specify a unique name to identify the authentication context
- Description: Specify a description to provide more information about the authentication context
- Select Publish to apps to advertise the authentication context to apps and to make it available to be assigned

Figure 1: Creating an authentication context
Assigning Conditional Access policies to authentication contexts
The second action is to create a Conditional Access policy. That Conditional Access policy can be used for assigning it to the authentication context. The creation of a Conditional Access policy, with the focus on the assignment of the authentication context, can be achieved by following the next five steps.
- Open the Microsoft Endpoint Manager admin center portal navigate to Endpoint security > Conditional Access > Policies, or open the Azure portal and navigate to Azure Active Directory > Security > Conditional Access > Policies
- On the Conditional Access | Policies page, click New policy
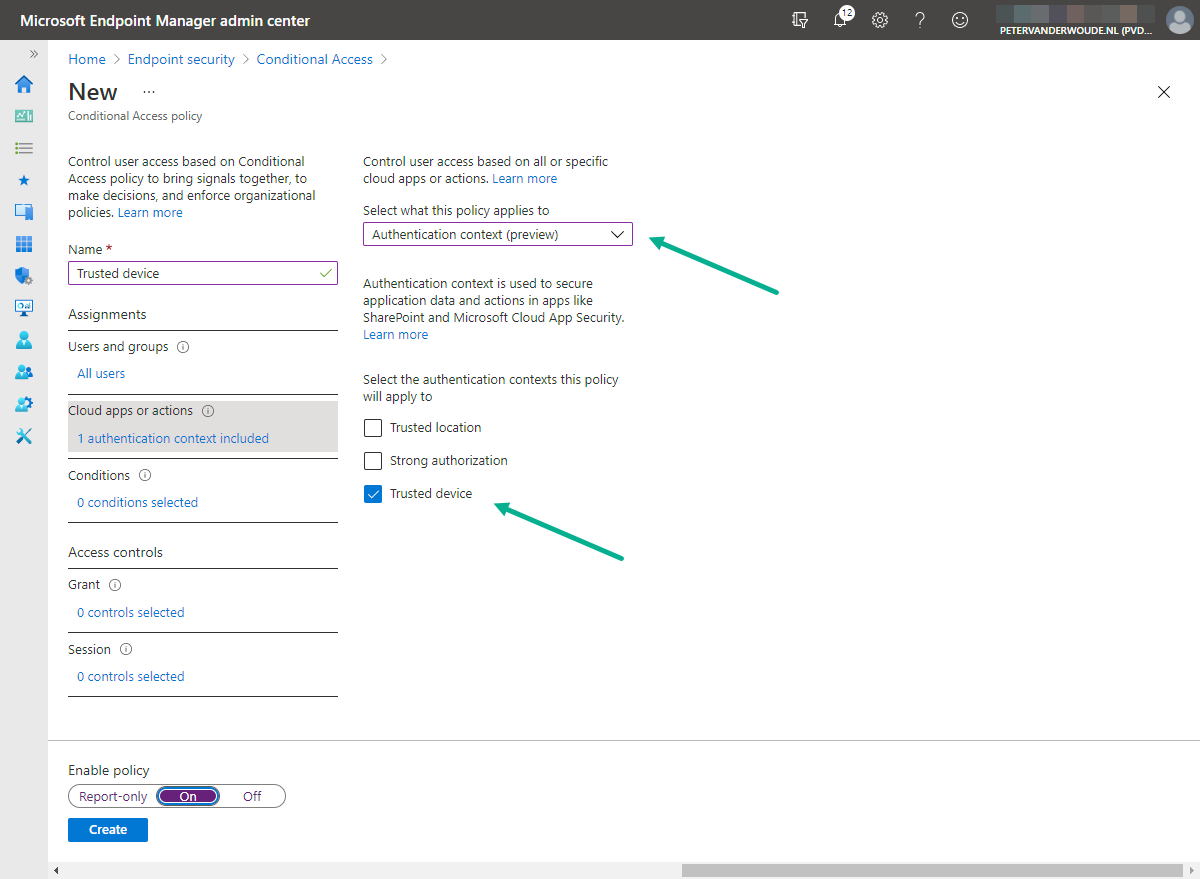
- On the Assignments section, as shown below in Figure 2, configure the following for the different assignments sections
- Users and groups: Select All users as the users that should be assigned with this policy
- Cloud apps or actions: Select Authentication context > {Select the created authentication context} as the authentication context that should be assigned with this policy
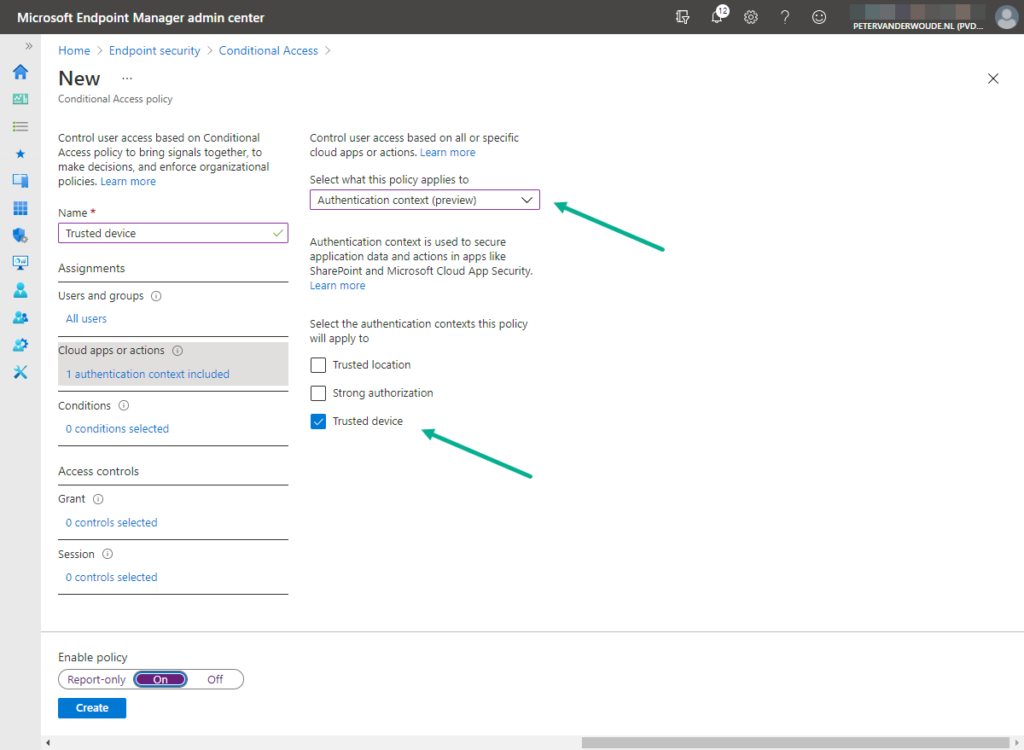
Figure 2: Assigning a Conditional Access policy to an authentication context
Important: Keep in mind that multiple Conditional Access policies can be assigned to a single authentication context and that a single Conditional Access policy can be assigned to multiple authentication contexts.
Note: To even further tighten the security, use authentication context in combination with filters for devices as a condition in a Conditional Access policy. That would enable the IT administrator to only target and allow specific devices.
- On the Access controls section, configure the following for the grant control
- Grant: Select Allow access > Require device to be compliant and Require multi-factor authentication and select Require all the selected controls to always require a compliant device and MFA for access to any SharePoint site that is tagged with the authentication context (with or without a sensitivity label)
- Session: Not applicable for this configuration
- Select Enable policy > On to enable the policy
Tagging SharePoint sites with authentication contexts
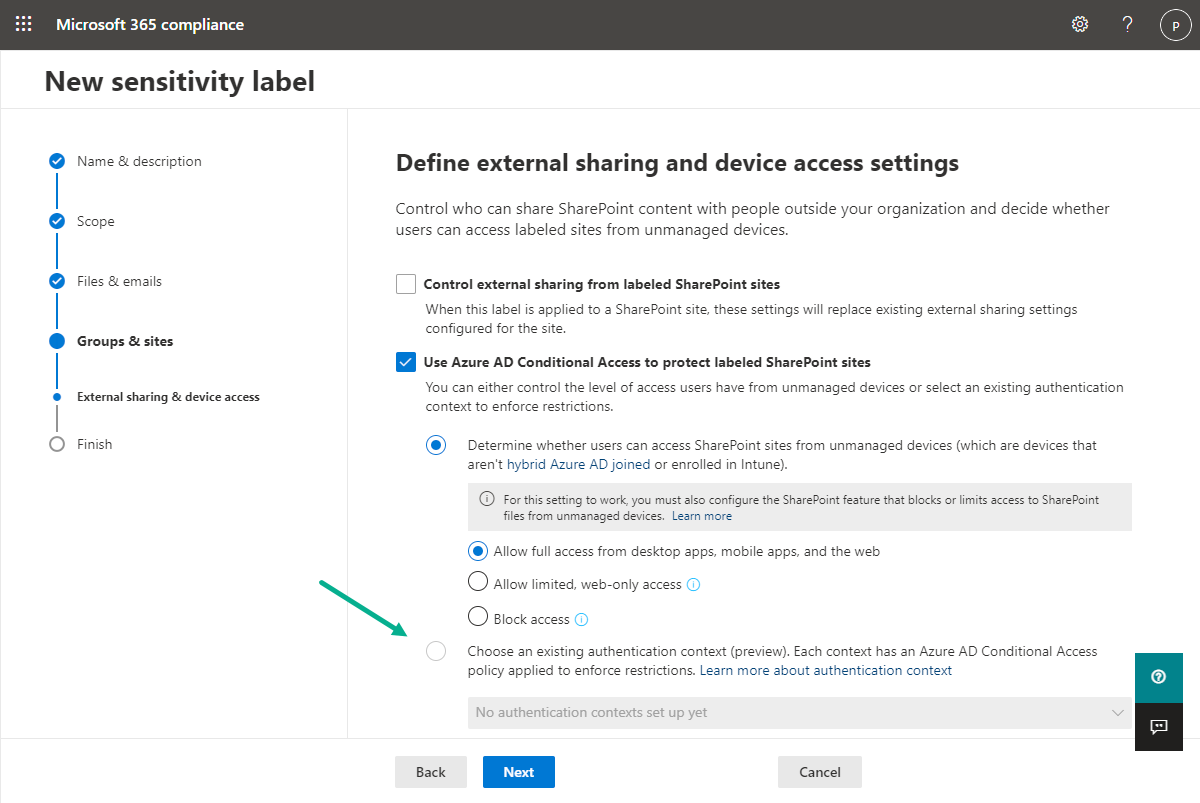
The third action is to tag a SharePoint site with an authentication context. That will make sure that the Conditional Access policy will be used as a step-up authentication for accessing the tagged SharePoint site. Eventually that can be achieved by using a sensitivity label, as shown below in Figure 3. During the preview it can take some time for that functionality to become available.

Figure 3: Tagging a sensitivity label with an authentication context
In the meantime it’s possible by using PowerShell. The Set-SPOSite cmdlet can be used to assign an authentication context to a SharePoint site. That cmdlet can be used with the ConditionalAccessPolicy parameter and a new value of AuthenticationContext, together with the new AuthenticationContextName parameter. Together that will be a command as shown below, in which {url} should be replaced with the url of the SharePoint site and {context} should be replaced with the created authentication context.
Set-SPOSite -Identity "{url}" -ConditionalAccessPolicy AuthenticationContext -AuthenticationContextName "{context}"Note: When eventually using sensitivity labels for tagging authentication contexts to SharePoint sites, it’s not possible to combine the behavior for unmanaged devices with authentication contexts. That makes perfect sense, as the main idea is to add a step-up authentication to specific SharePoint sites and that often doesn’t match with access on unmanaged devices.
Experiencing authentication contexts
The place to experience authentication contexts is by looking at the results of the applied Conditional Access policies. Navigate to Azure Active Directory > Monitoring > Sign-ins and verify the information that is related to the sign in of the tagged SharePoint site. That should show something similar to Figure 4 below. The standard Conditional Access policy is applied (see number 1), followed with applying the authentication context Conditional Access policy (see number 2). That second Conditional Access policy is triggered to require the step-up authentication. In this case that second policy requires a MFA and a compliant device (as configured earlier in this post).
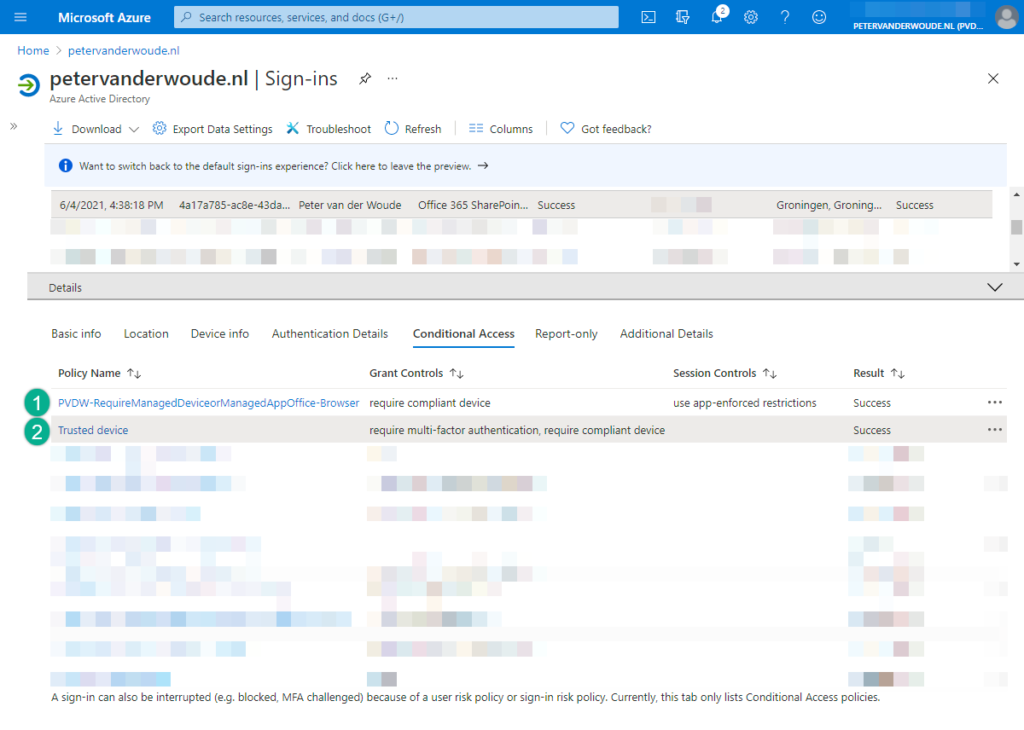
Figure 4: Overview of the evaluation information of the Conditional Access policies

More information
For more information about using authentication contexts with Conditional Access policies, refer to the following docs.