My first post after my vacation will be about bulk enrollment for Windows 10 devices. Not bulk enrollment for on-premises enrollment, but bulk enrollment for cloud enrollment. In other words, Microsoft Intune is required. This blog post will contain a short introduction about bulk enrollment, the configuration of bulk enrollment and the end-user and administrator experience with bulk enrollment.
Introduction
Bulk enrollment is a more automated method for enrolling devices, as compared to normal end-user enrollment, which requires end-users to enter their credentials to enroll the device. Bulk enrollment uses an enrollment package to authenticate the device during enrollment. That enrollment package also contains a certificate profile and optionally a Wi-Fi profile.
At this moment bulk enrollment for Windows 10 devices is not supported, or does not work, in all scenarios. Keep the following in mind when thinking about bulk enrollment for Windows 10 devices:
- Bulk enrollment does not support Azure AD join;
- Bulk enrollment does not work with Microsoft Intune standalone;
- Bulk enrollment does work with Microsoft Intune hybrid, where the enrollment package is generated via the Configuration Manager console.
Configuration
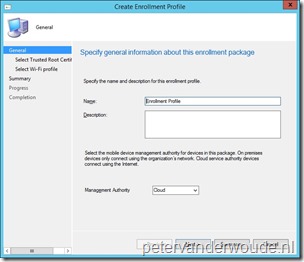
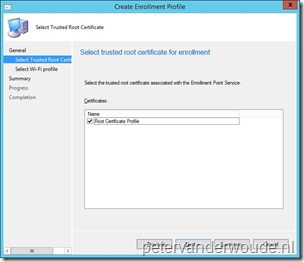
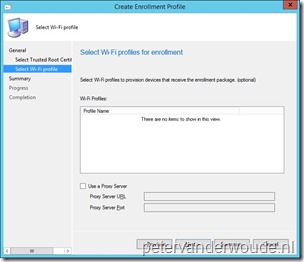
Now let’s have a look at the configuration. The configuration of an enrollment profile for bulk enrollment contains two main steps. The first step is to create the enrollment profile and the second step is to create the enrollment package.
Step 1: Create enrollment profile
The first step is to create an enrollment profile. This can be achieved by performing the steps below. Before starting with the steps below, make sure that a certificate profile for the root certificate is available, as it’s a requirement during the creation of the enrollment certificate.
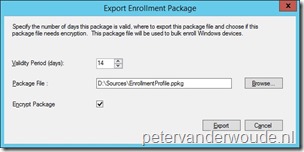
Step 2: Create enrollment package
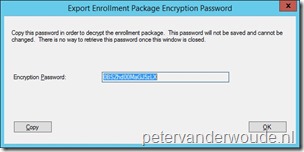
The second step is to create the enrollment package. The enrollment package is the actual file that is used to bulk-enroll devices. This file is created via the Configuration Manager administration console and can eventually be opened with the Windows Image and Configuration Designer (ICD),. Within the Windows ICD the configuration can be verified. To create the enrollment package, perform the following steps.
Experience
Now it’s time to look at the experience, from both the end-user perspective and the administrator perspective. Both experiences show interesting information, which makes it good to show as part of this blog post.
End-user experience
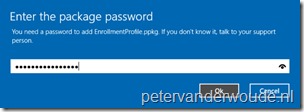
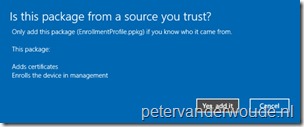
From the end-user experience it’s interesting to show the usage of the enrollment package. Just to show how easy it works. However, the enrollment package must be physically delivered to the device of the end-user. Once the end-user double-clicks the enrollment package, the end-user receives the standard User Account Control (UAC) message followed by the messages show below. The first message is only applicable once the enrollment package is encrypted and the second message is always applicable. The second message simply show what the enrollment package will adjust and asks if the enrollment package is from a trusted source.
 |
 |
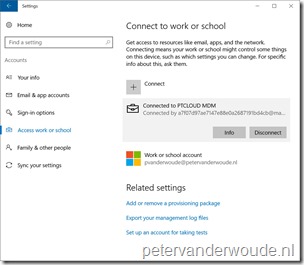
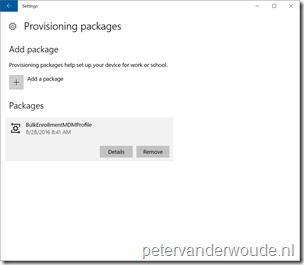
Once the enrollment is successful the end-user can verify the two places shown below. The first place is Settings > Accounts > Access work or school, which will show that the device is connected to MDM. The second place is Settings > Accounts > Access work or school > Add or remove a provisioning package, which will show the added provisioning package.
 |
 |
Administrator experience
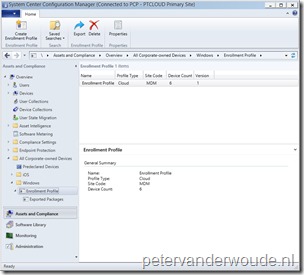
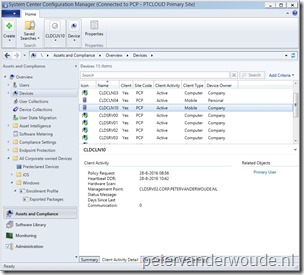
From the administrator experience it’s interesting to look at, at least, the two places in the Configuration Manager administration console shown below. The first place is Assets and Compliance > Overview > All Corporate-owned Devices > Windows > Enrollment Profile, which will show the created enrollment profile including interesting details like Device Count. That device count relates to the number of devices that are enrolled via the enrollment profile. The second place is Assets and Compliance > Overview > Devices, which simply shows the devices in the environment. This is interesting as it will show that the Device Owner is set to Company for (bulk) enrolled devices.
 |
 |
More information
For more information about bulk enrollment for Windows 10, please refer to:
- Bulk enrollment: https://msdn.microsoft.com/en-us/library/windows/hardware/mt613115
- How to bulk-enroll devices with On-premises Mobile Device Management in System Center Configuration Manager: https://technet.microsoft.com/en-us/library/mt627898.aspx
- How to create certificate profiles in System Center Configuration Manager: https://technet.microsoft.com/en-us/library/mt629203.aspx
- How to create Wi-Fi profiles in System Center Configuration Manager: https://technet.microsoft.com/en-us/library/mt629440.aspx
